If you didn’t import menu when you imported the theme, or you want a extra menu, you can create and set your menu in Appearance > Menus.
Menu Setup
Create Menu
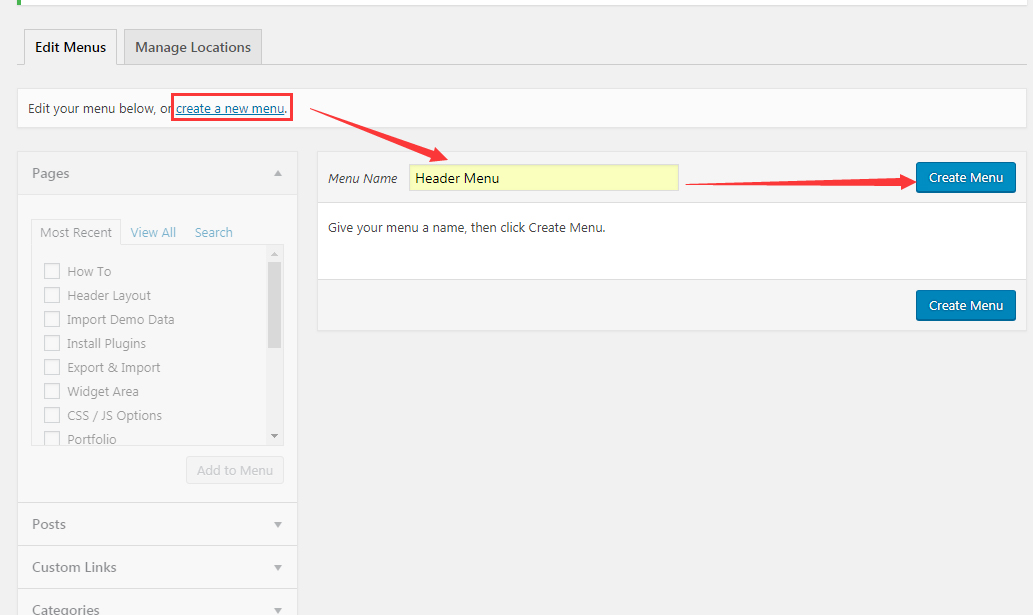
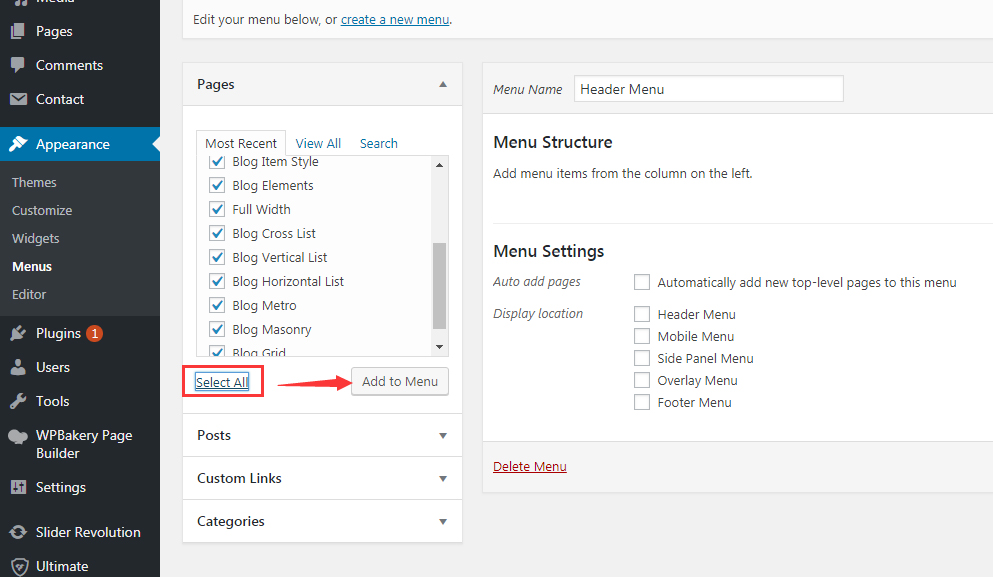
Step 01. Go to Admin > Appearance > Menus, click the create a new menu, then fill the Menu Name, for example “Header Menu”. Then click the Create Menu button.
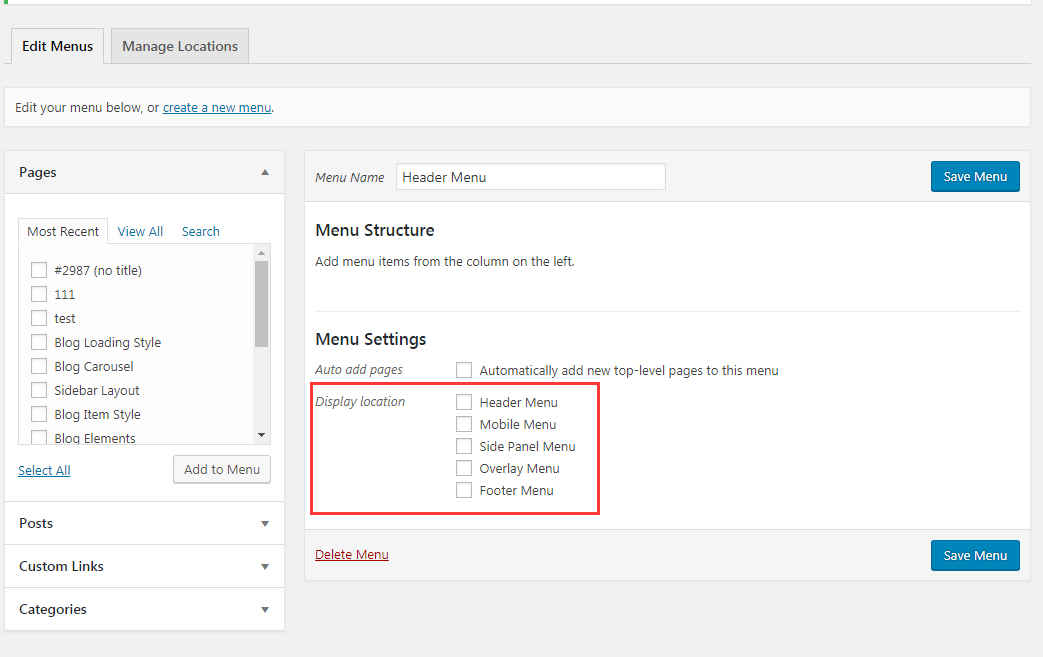
Step 02. Then you need to specify a Display location for the menu you just created in Menu Settings options. The theme includes 5 Menu locations: Header Menu, Mobile Menu, Side Panel Menu, Overlay Menu and Footer Menu. In Admin > Appearance > Menus > Manage Locations, you can also set and manage Menu location. If you want to display footer menu, you need to go to Theme Options > Footer, and set Layout as Footer Style 02.
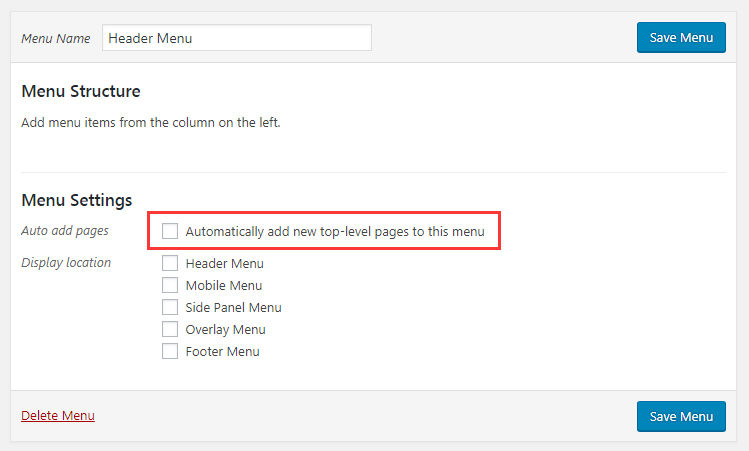
Step 03. If you want the newly added top-level pages to be automatically added to the newly created menu, please have Auto add pages checked in Menu Settings options.
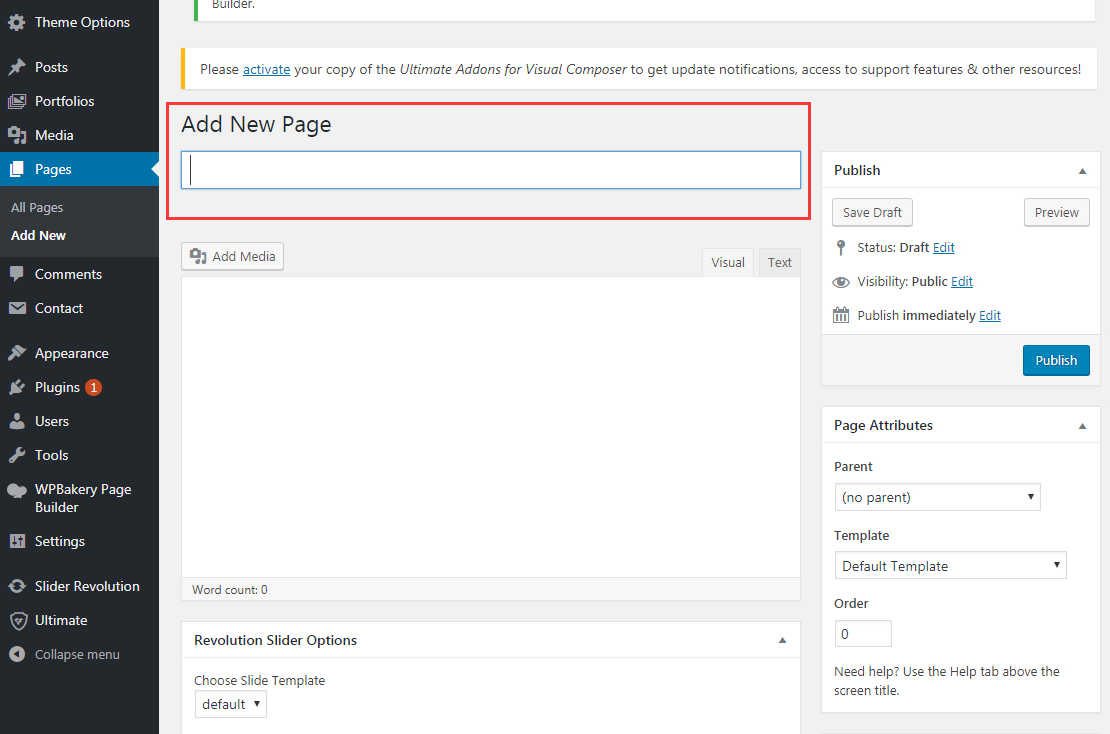
Step 04. Go to Admin > Pages > Add New Page to add the page you need.
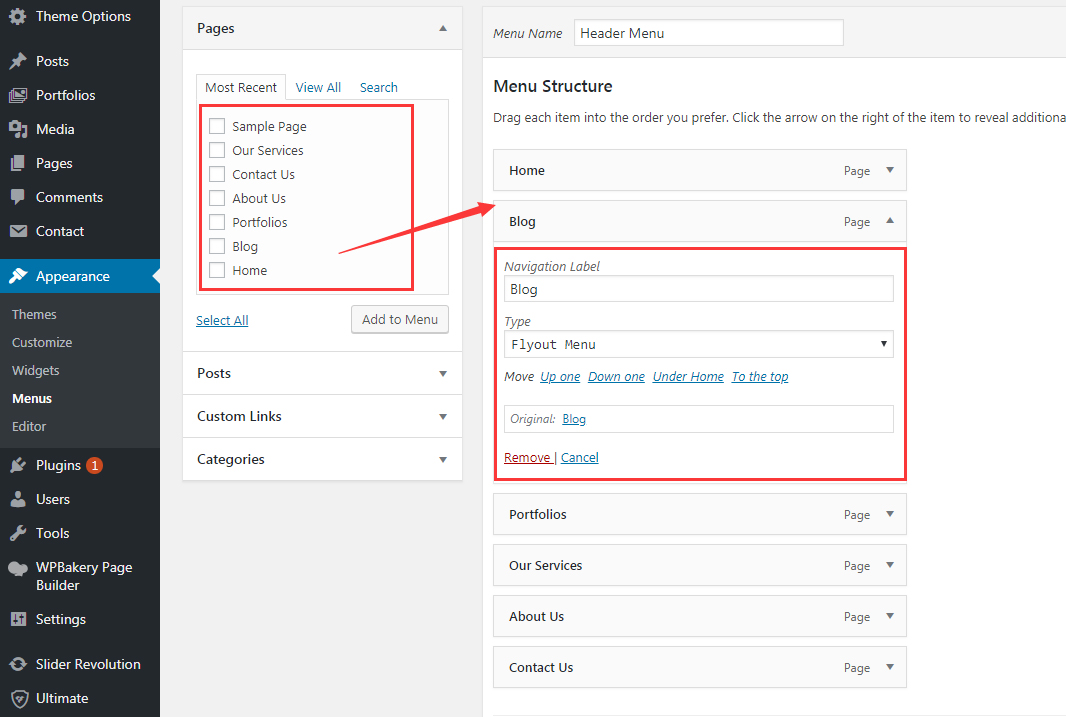
Step 05. Return to the set the Menu Structure in Appearance > Menus. Menu item can be a page, post, category, portfolio or custom link. Choose what you want to add to menu from the option list on left. For example, Pages list, select the needed pages from it. If you want to add all the created pages, then click the Select All, and then click the Add to Menu menu.
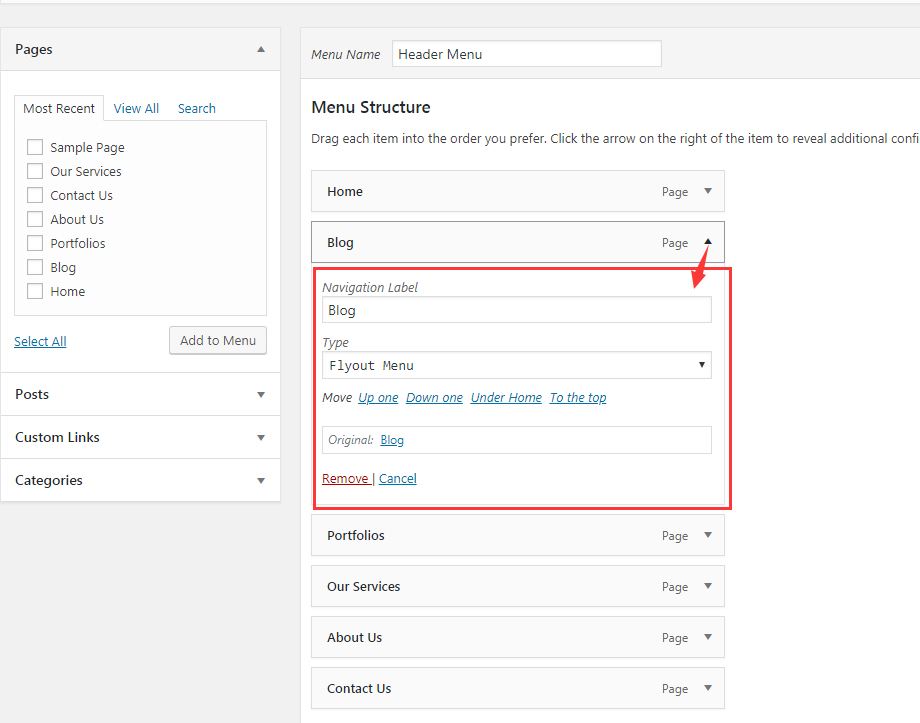
Step 06. Go to Admin > Appearance > Menus, in Edit Menus interface, click the small arrow on the right to unfold the menu item, select “Mega Menu” in the Type options, then you can set the menu to the form of mega menu.
How to set menu level?
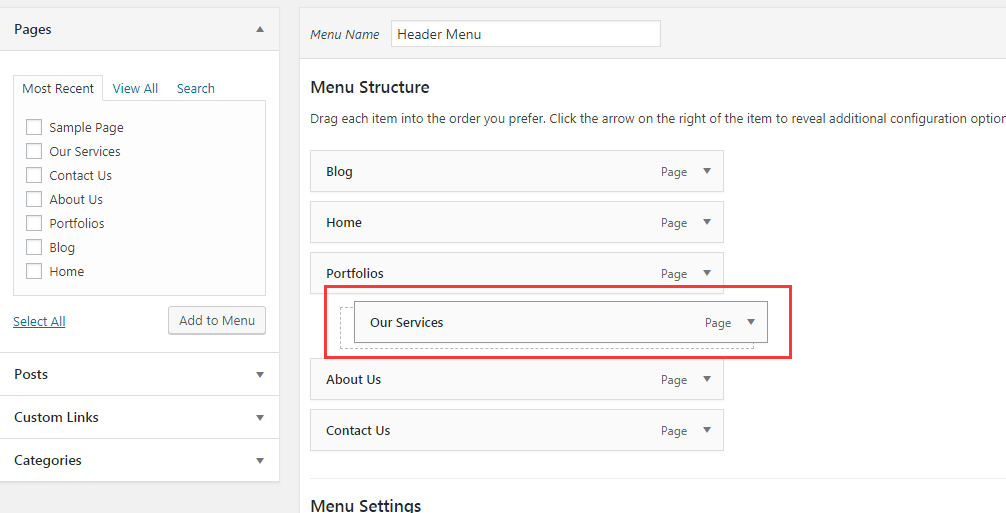
Step 01. Go to Admin > Appearance > Menus, in Edit Menus interface, you can quickly manage the menu level and sort by dragging and dropping menu items in the menu list.
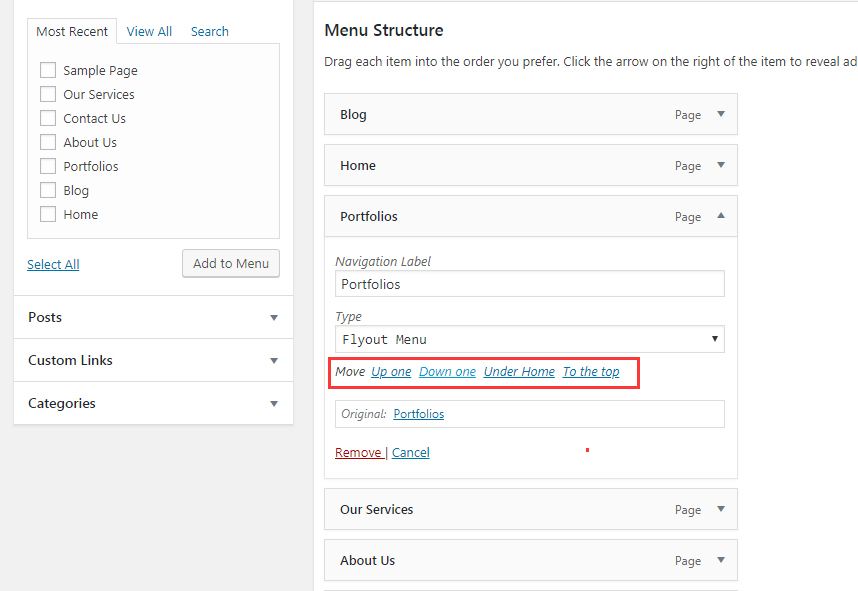
Step 02. Click the small arrow on the right of menu items, you can also adjust the position and level of menu by Move
How to set Mega Menu?
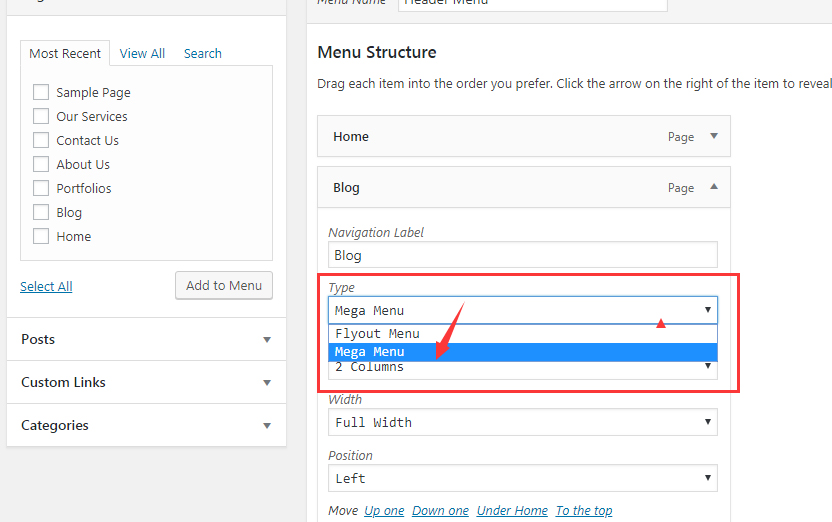
Step 01. Go to Admin > Appearance > Menus, in Edit Menus interface, click the small arrow on the right to unfold the menu item, select “Mega Menu” in the Type options, then you can set the menu to the form of mega menu.
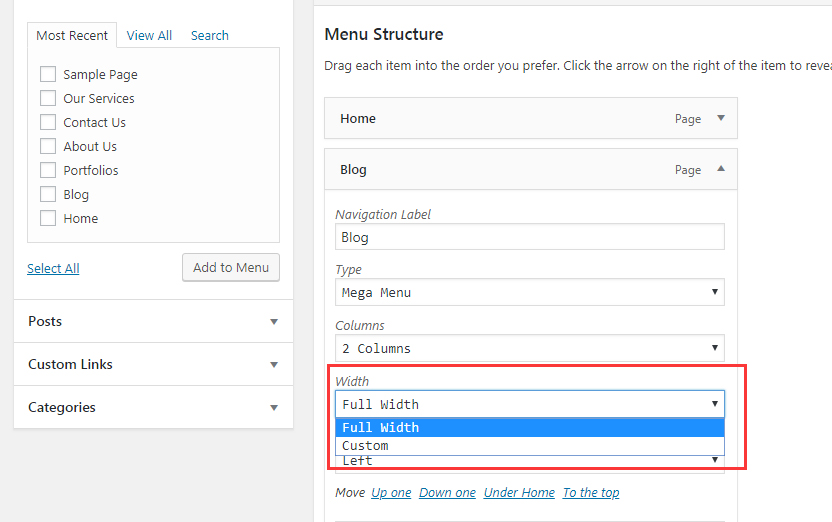
Step 02. You can set how many columns to display in the Columns options.
Step 03. You can use Width option to set the width of display area in mega menu, Full Width means it has the same width as theme content, Custom means you can custom the width value.
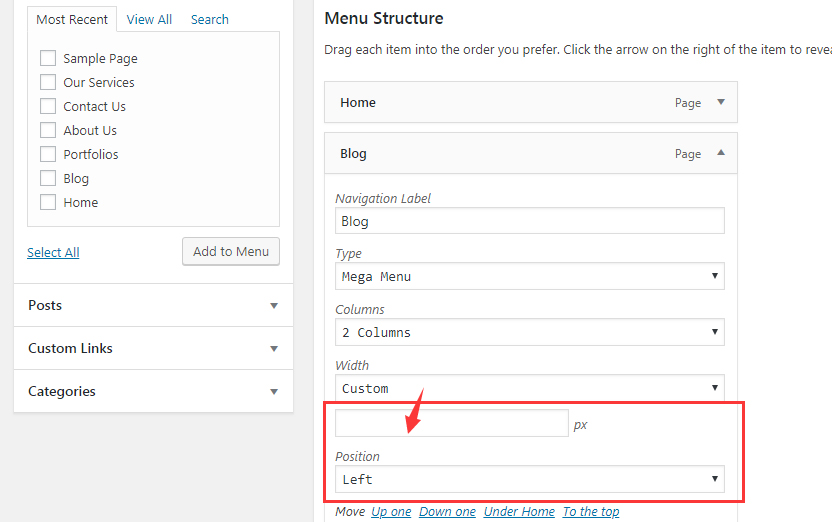
Step 04. After choosing Custom for Width, you can set the alignment way of mega menu area with Position option. Left means it aligned with the left side of the main menu, Center means it center aligned with the main menu, Right means it aligned with the right side of the main menu.
Step 05. If you want to display multiple sets of menus in one column of mega menu (screenshot), you can do it with the following way.
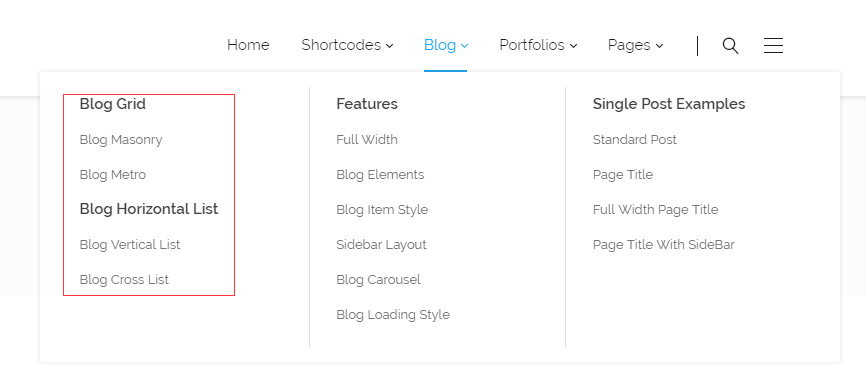
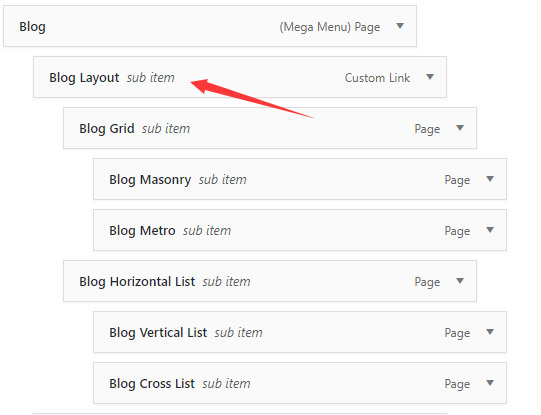
Step 05-1. Put all the wanted multiple sets of menus (like the Blog Grid & Blog Horizontal List and their sub menu as shown in the examples) to a same second level menu item (as the Blog Layout in the example).
Step 05-2. Click the small arrow on the right to expand the Blog Layout menu items, set it to Hide in the Display Title setting options.
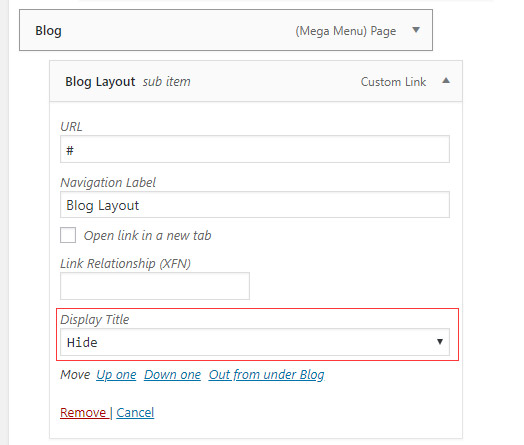
Step 05-3. Click the Save Menu button.
Mega Menu Template
Mega menu can not only display menu items, but also can display custom content. You can set it with the following steps.
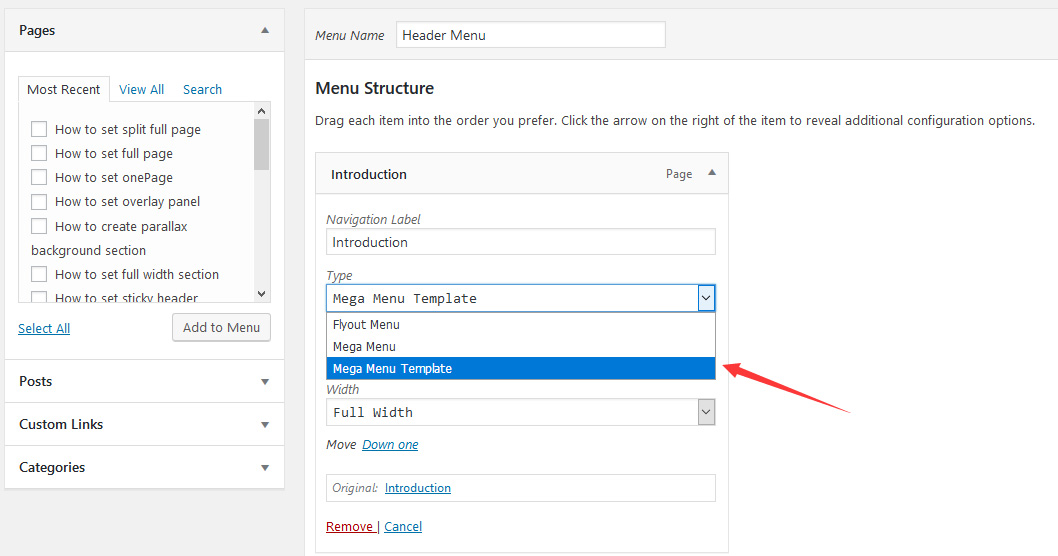
Step 01. Go to Admin > Appearance > Menus, in Edit Menus interface, click the small arrow on the right to unfold the menu item, select “Mega Menu Template” in the Type options.
Step 02. You need to choose one template.
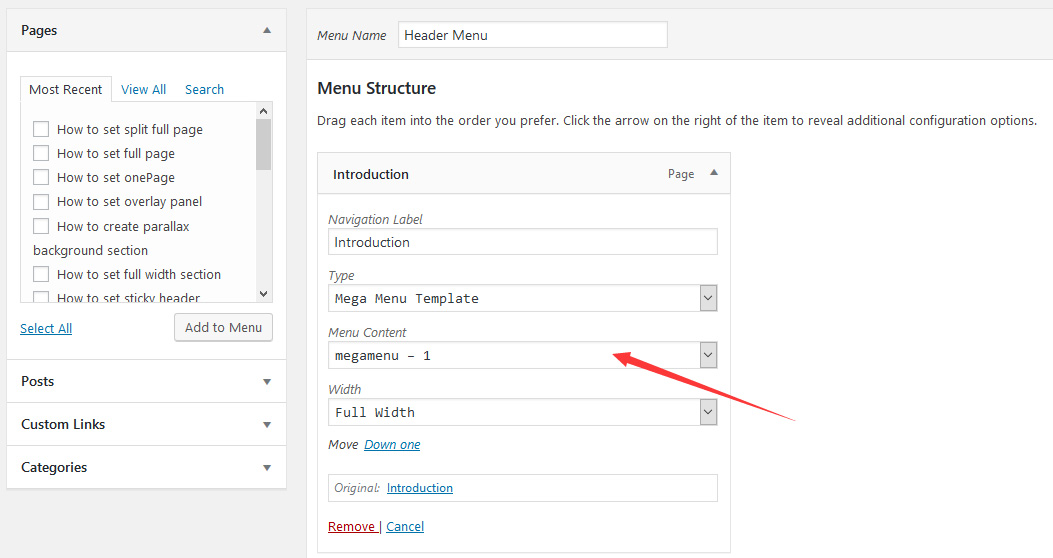
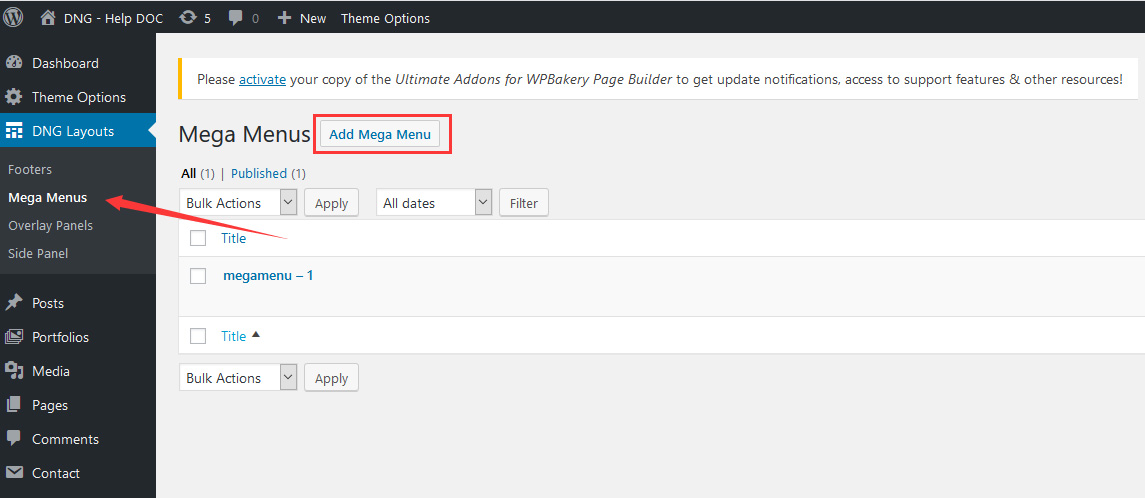
Step 03. If the template list is left empty, then you need to create a template in Admin > DNG Layout > Mega Menus.
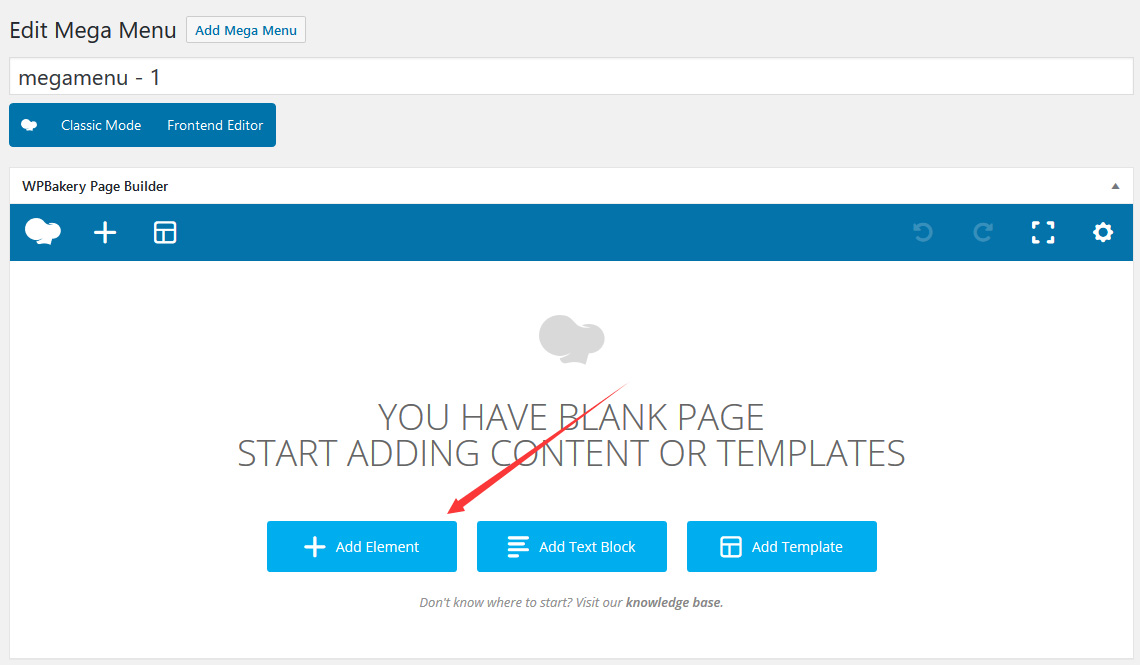
Step 04. You can create content for template with WPBakery Page Builder editor.
How to add icon for menu item?
Step 01. Go to Admin > Appearance > Menus > Edit Menus > Menu Structure, click the small sorrow to expand the menu item.
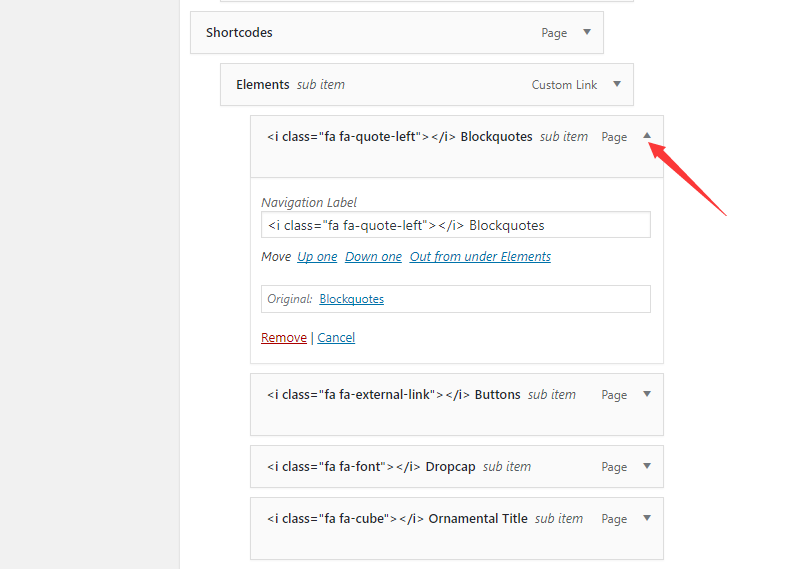
Step 02. In the input box of Navigation Label, input the code before the name of menu item: <i class=”fa fa-quote-left”></i>, fa-quote-left is the icon’s name, you can just change it to the icon’s name you need.
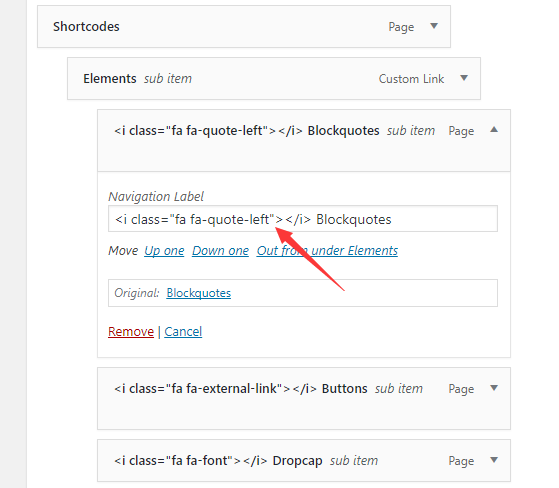
Step 03. You can check all icons and names via this link.
How to display menus
There are Header Menu, Mobile Menu, Side Panel Menu, Overlay Menu and Footer Menu in this theme. And we will state how to display these menus in the following:
Header Menu
Step 01. Go to Admin > Theme Options > Header Layout interface, add controls to some header areas where you want to display menu, and set it as Horizontal Menu.
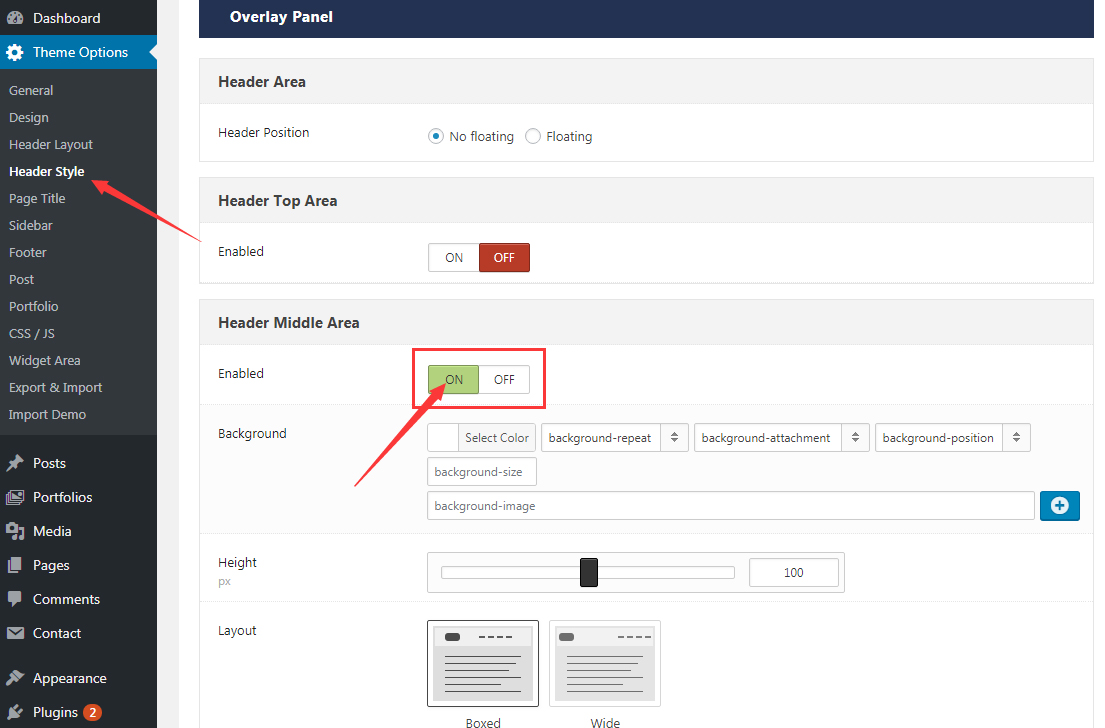
Step 02. Please go to Admin > Theme Options > Header Style > Area Settings interface, check to make sure that the header area where menu is has been enabled, otherwise menu won’t display.
Step 03. Go to Admin > Appearance > Menus > Edit Menus interface, select the menu you want to display from the created menus, use Menu Settings to specify it to Header Menu.
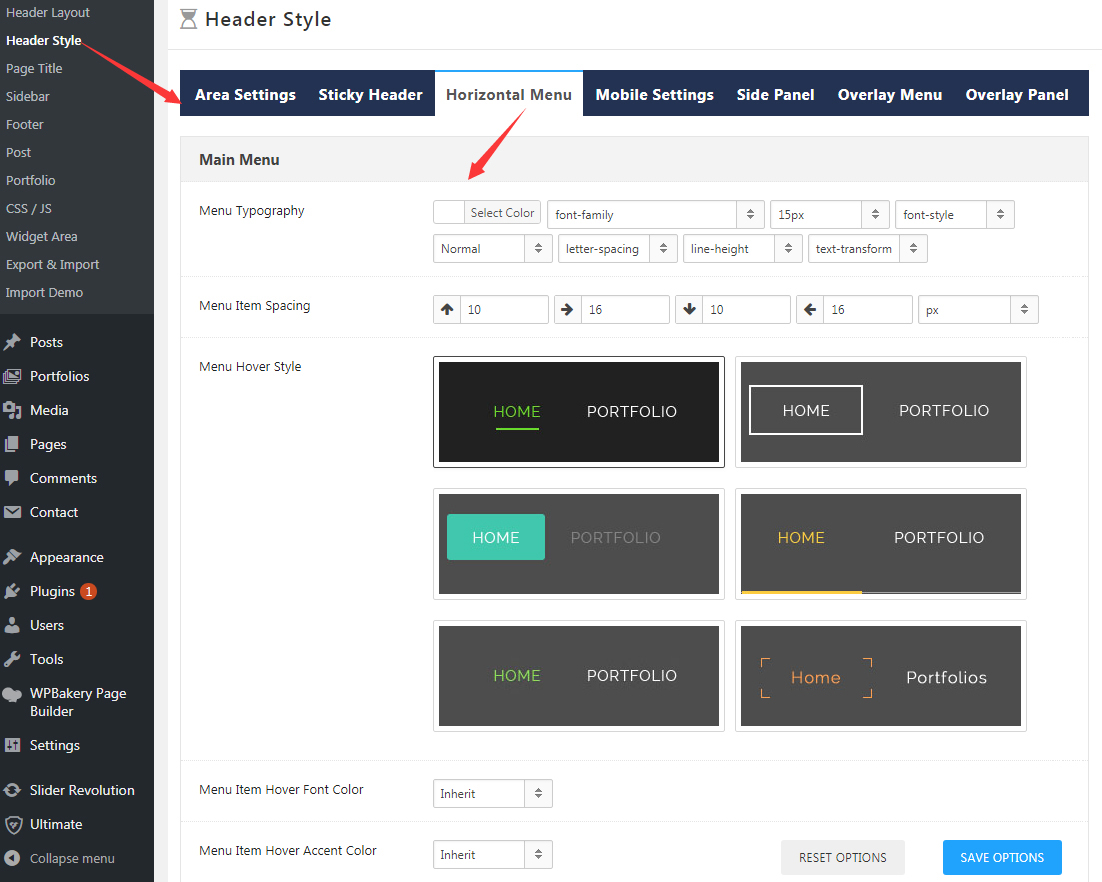
Step 04. Go to Admin > Theme Options > Header Style > Horizontal Menu interface, you can set the style of header menu in Main Menu.
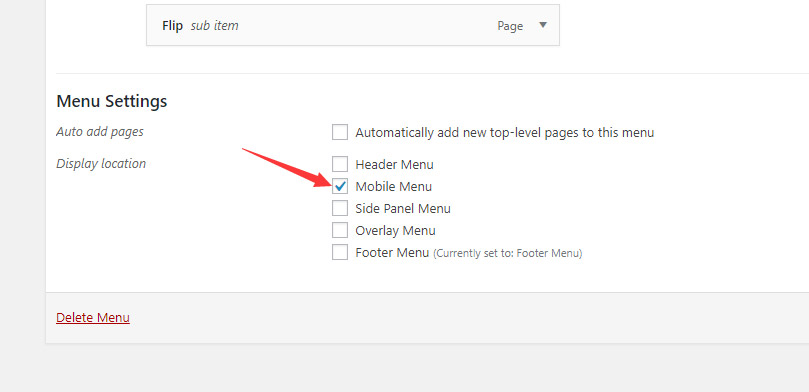
Mobile Menu
Go to Admin > Appearance > Menus > Edit Menus interface, select the menu you wan to display from the created menus, use Menu Settings to specify it to Mobile Menu.
Side Panel Menu
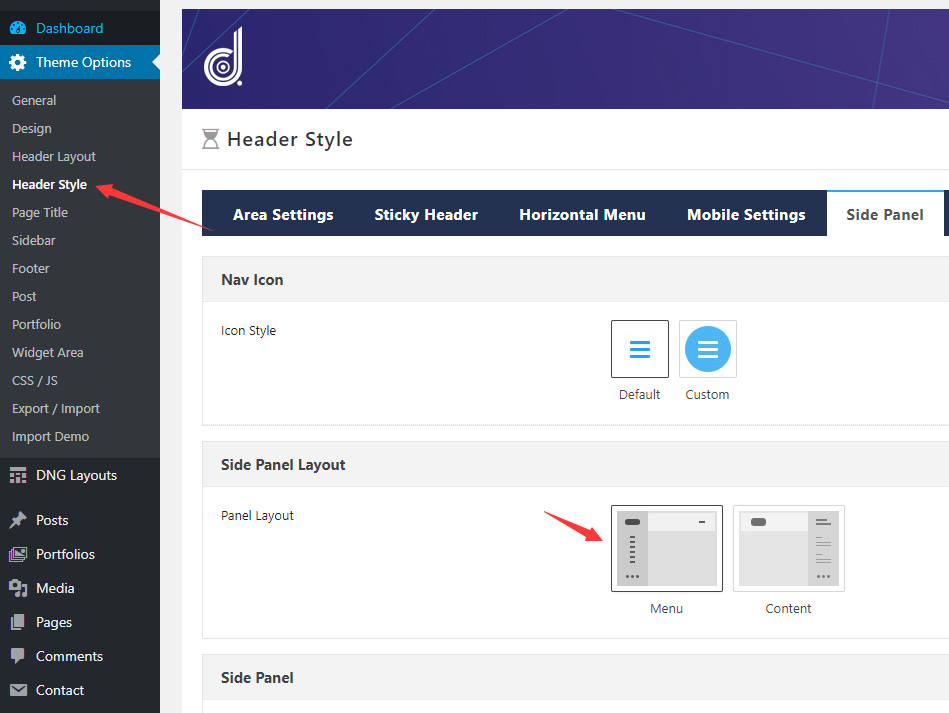
Step 01. Go to Admin > Theme Options > Header Layout interface, add controls to some header area where you want to display menu, and set it as Side Panel.

Step 02. Please go to Admin > Theme Options > Header Style > Side Panel Layout interface, change Panel Layout to be Menu.
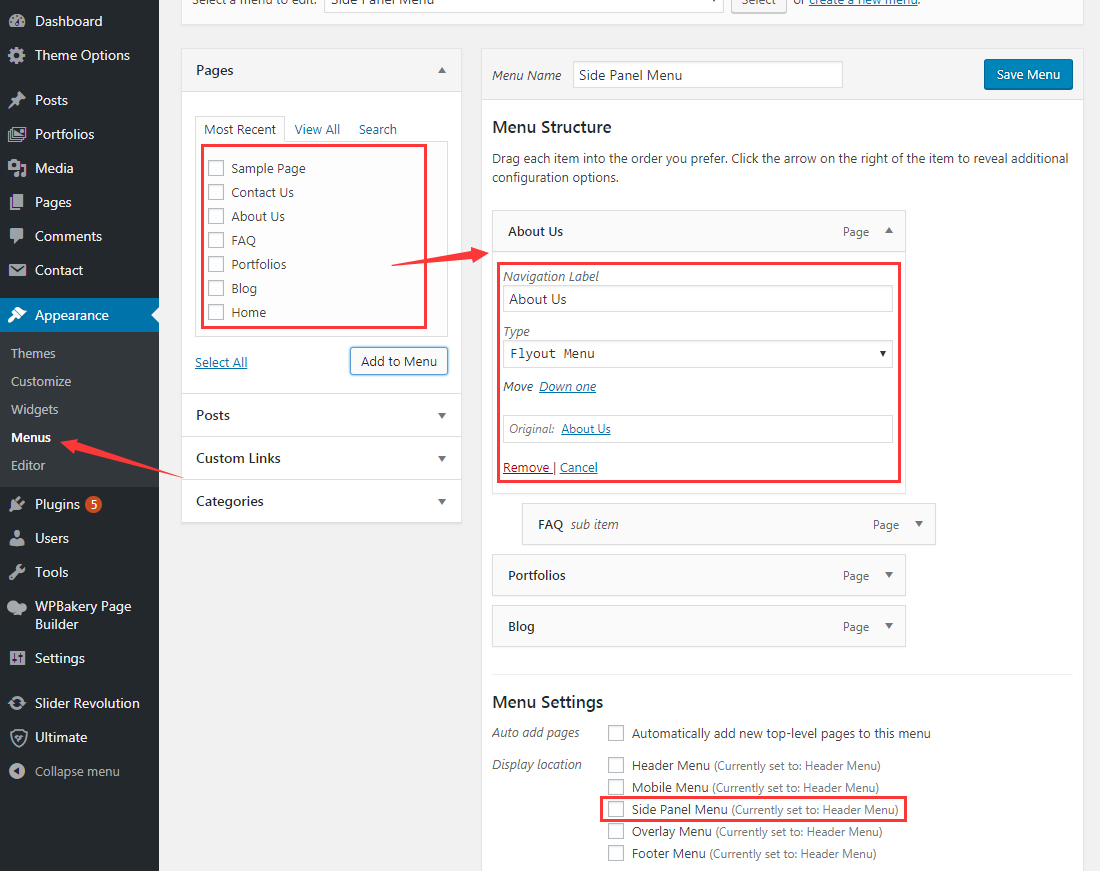
Step 03. Go to Admin > Appearance > Menus > Edit Menus interface, select the menu you want to display from the created menus, use Menu Settings to specify it to Side Panel Menu.
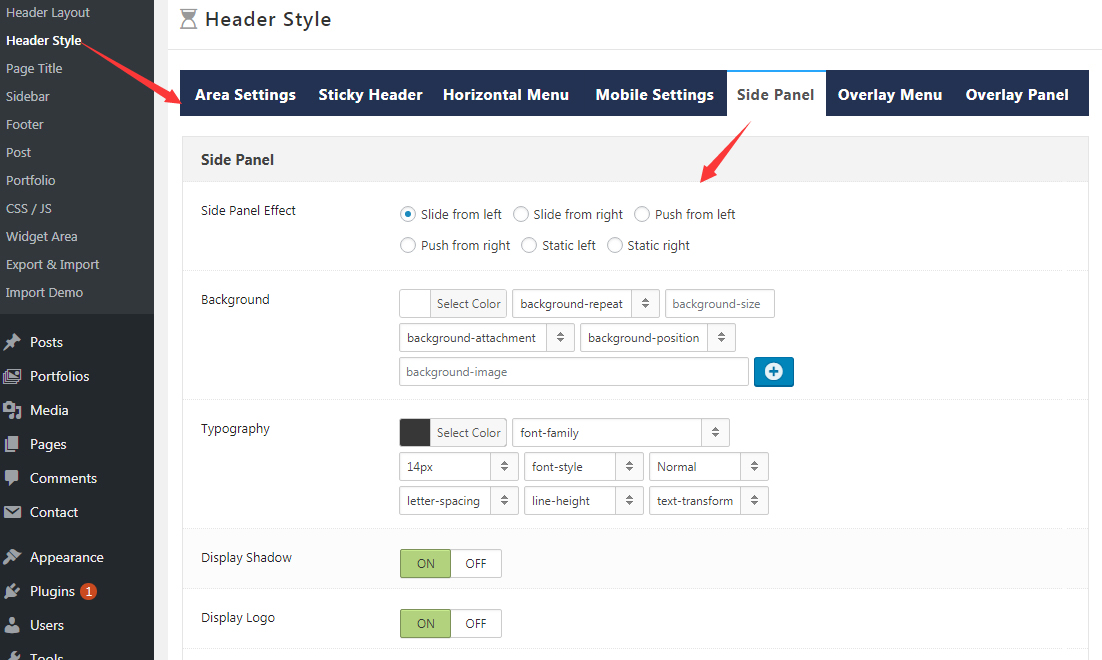
Step 04. In Admin > Theme Options > Header Style > Side Panel interface, you can set the style of side panel menu.
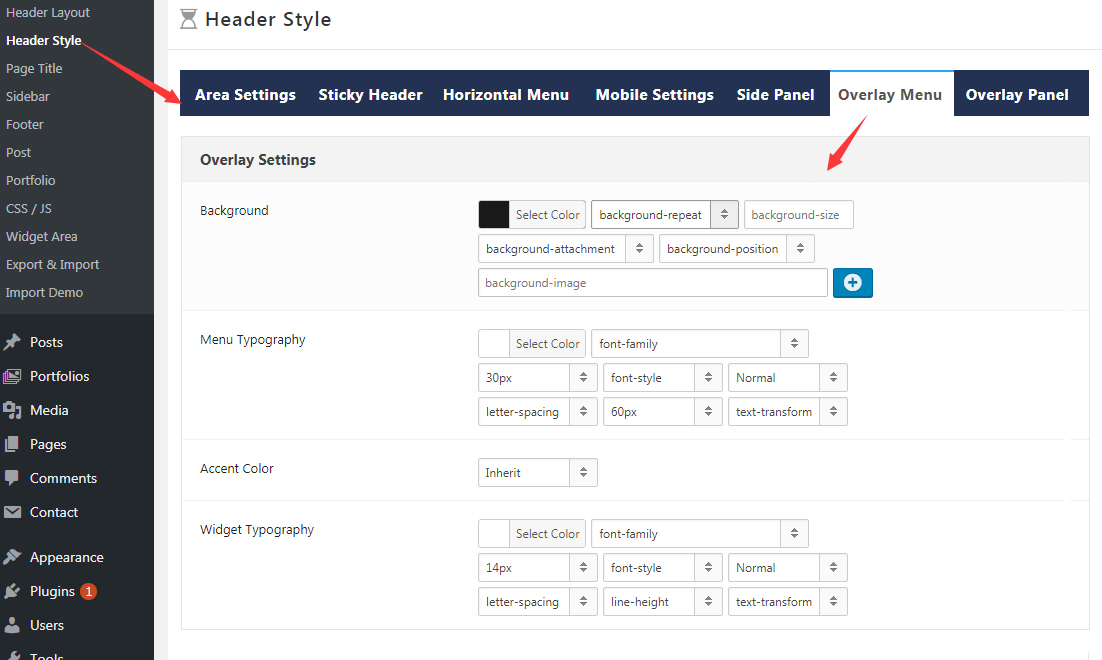
Overlay Menu
Step 01. Go to Admin > Theme Options > Header Layout interface, add controls to some header area where you want to display menu, and set it as Overlay Menu.
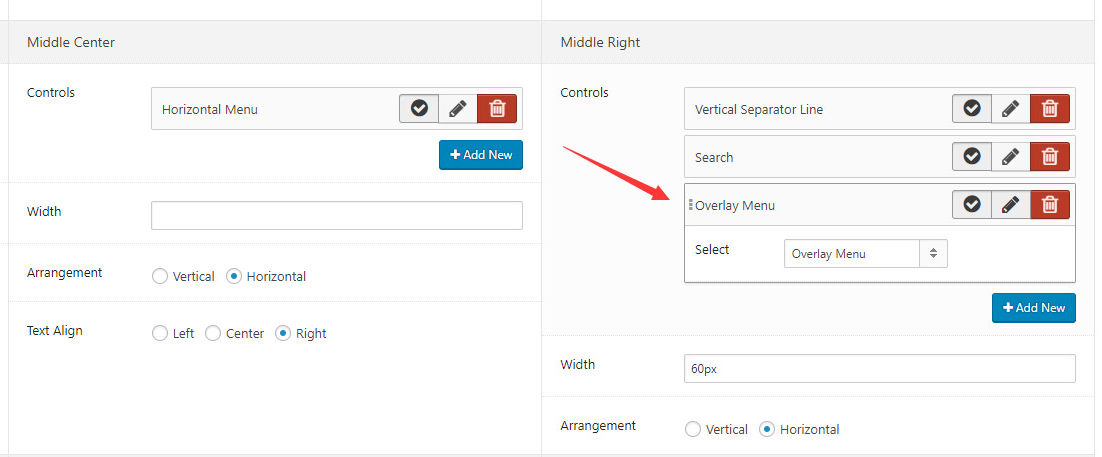
Step 02. Please go to Admin > Theme Options > Header Style > Area Settings interface, check to make sure that the header area where menu is has been enabled, otherwise menu won’t display.
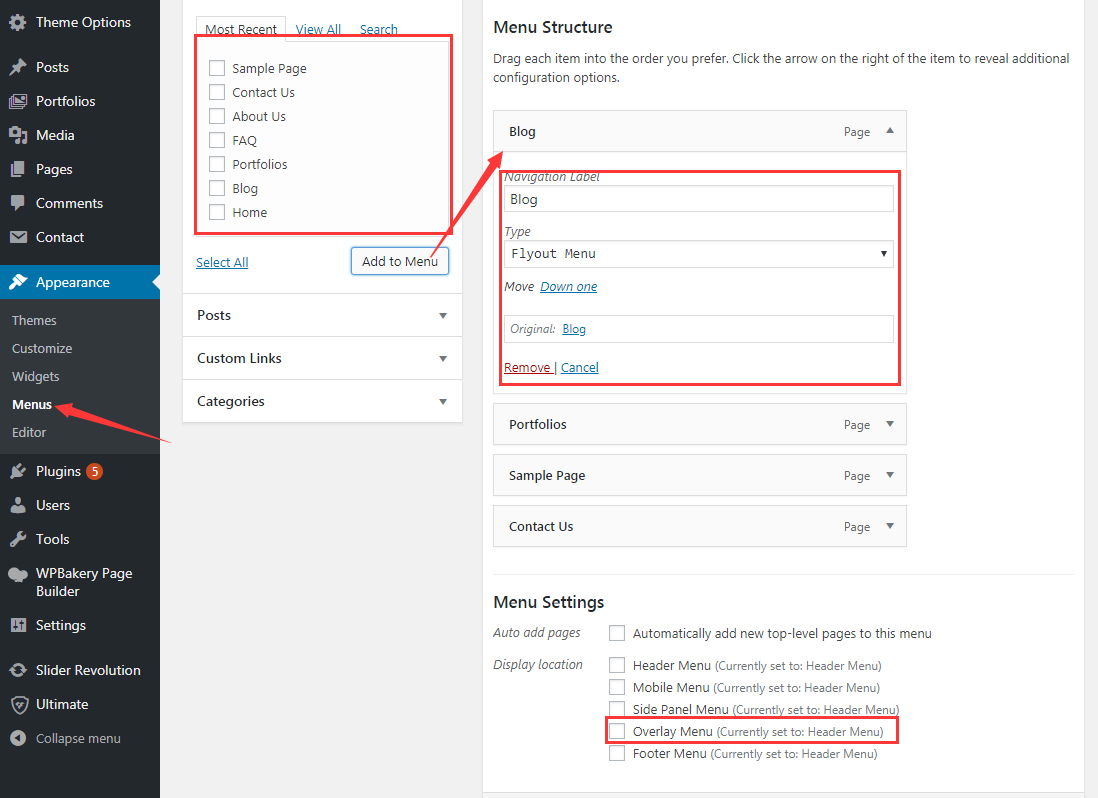
Step 03. Go to Admin > Appearance > Menus > Edit Menus interface, select the menu you want to display from the created menus, use Menu Settings to specify it to Overlay Menu.
Step 04. Go to Admin > Theme Options > Header Style > Overlay Menu interface, you can set the overlay menu style via the Overlay Settings setting area.