WPBakery Page Builder

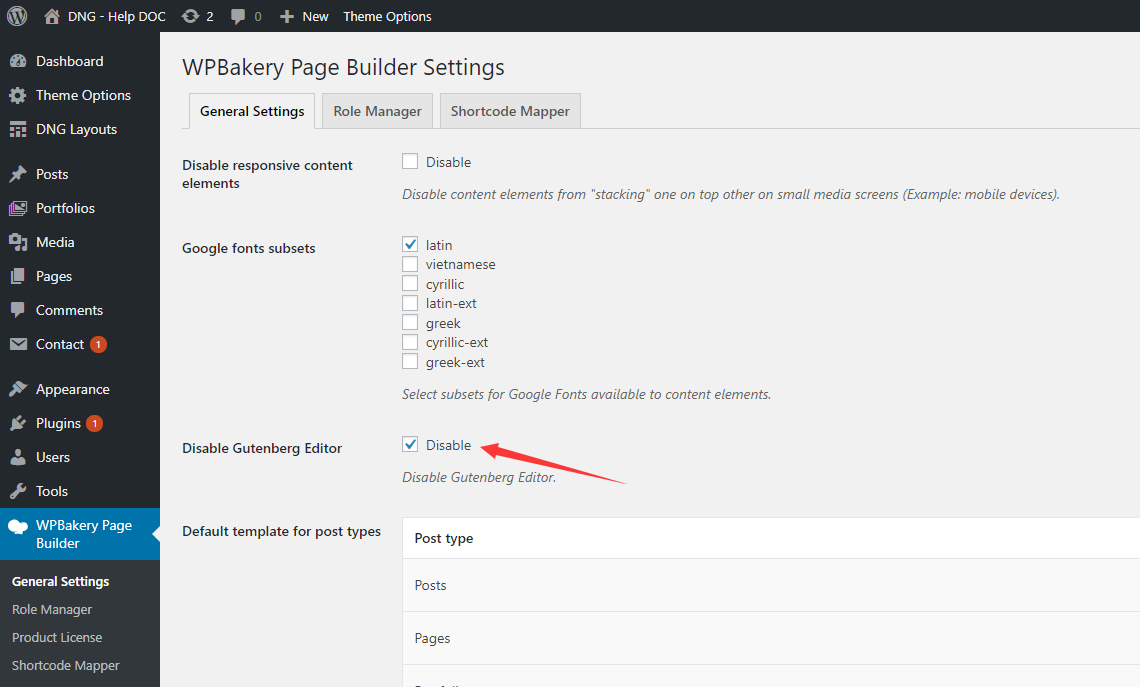
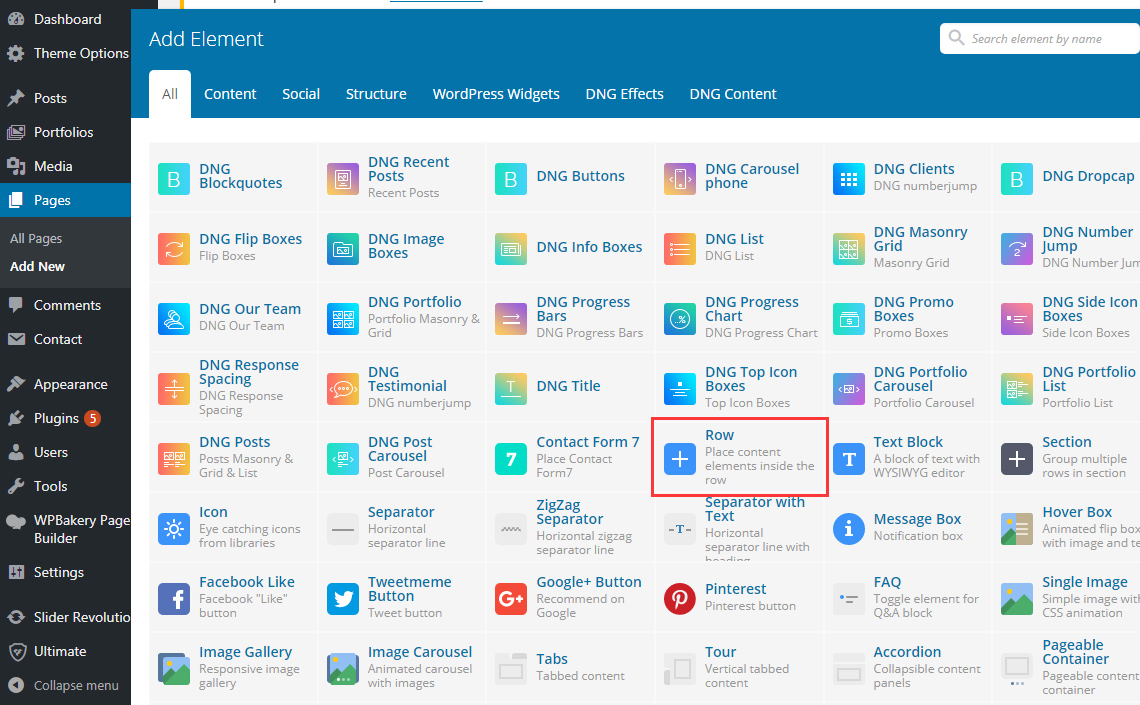
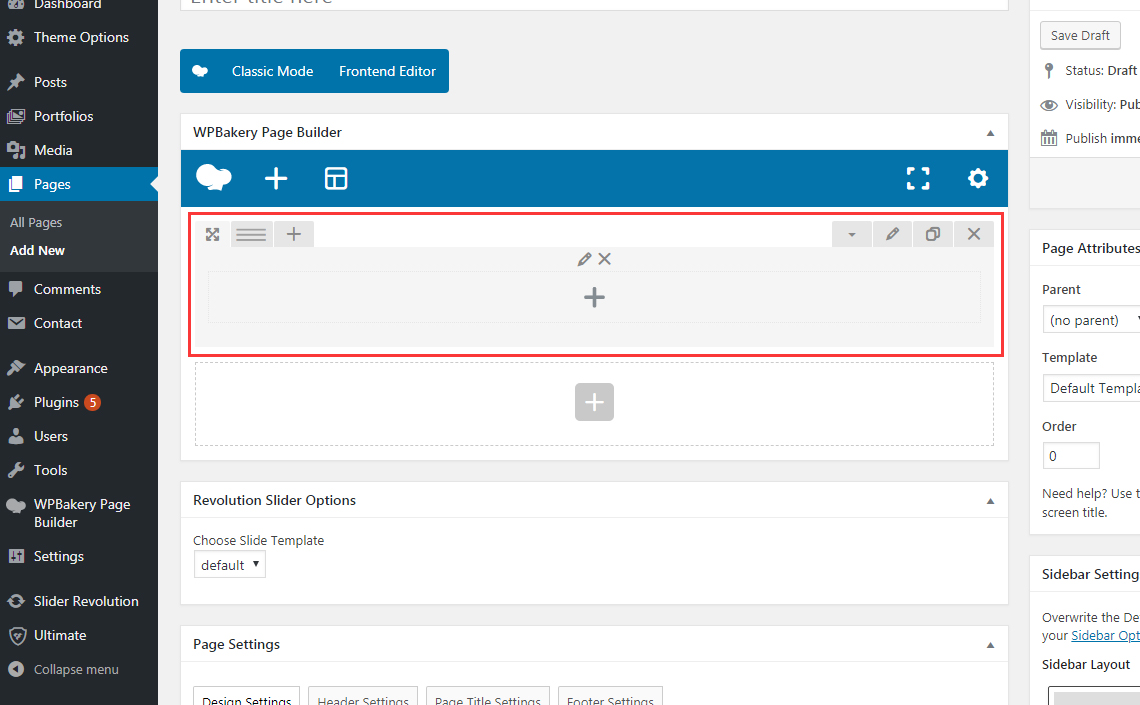
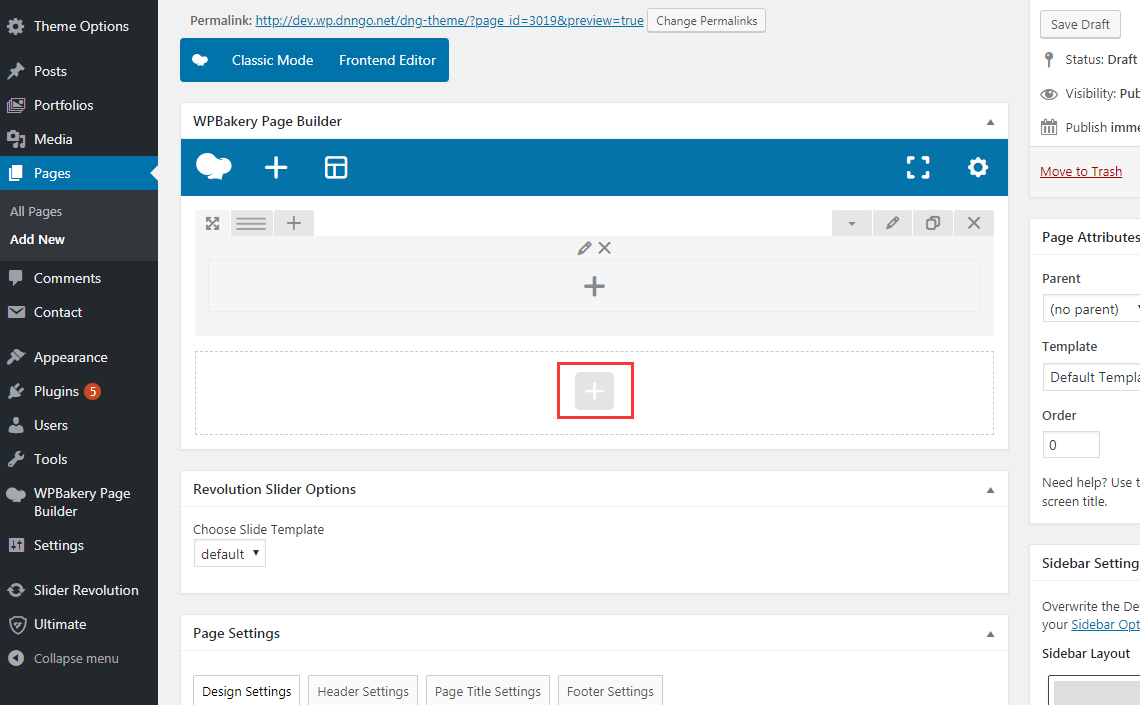
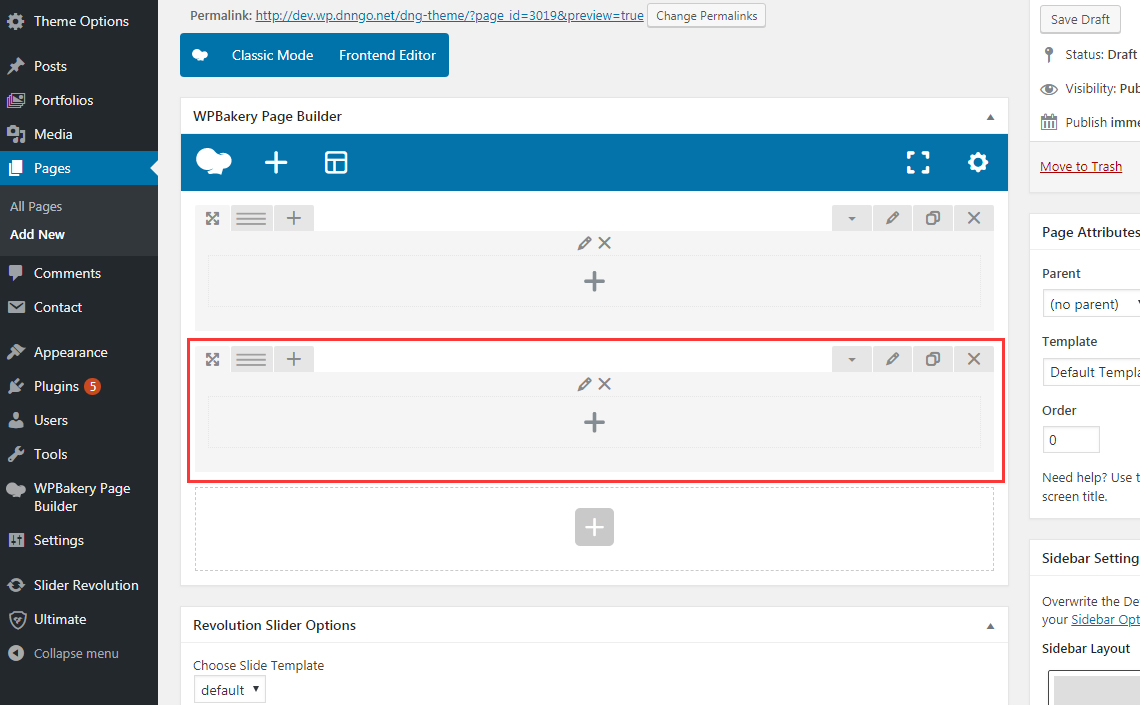
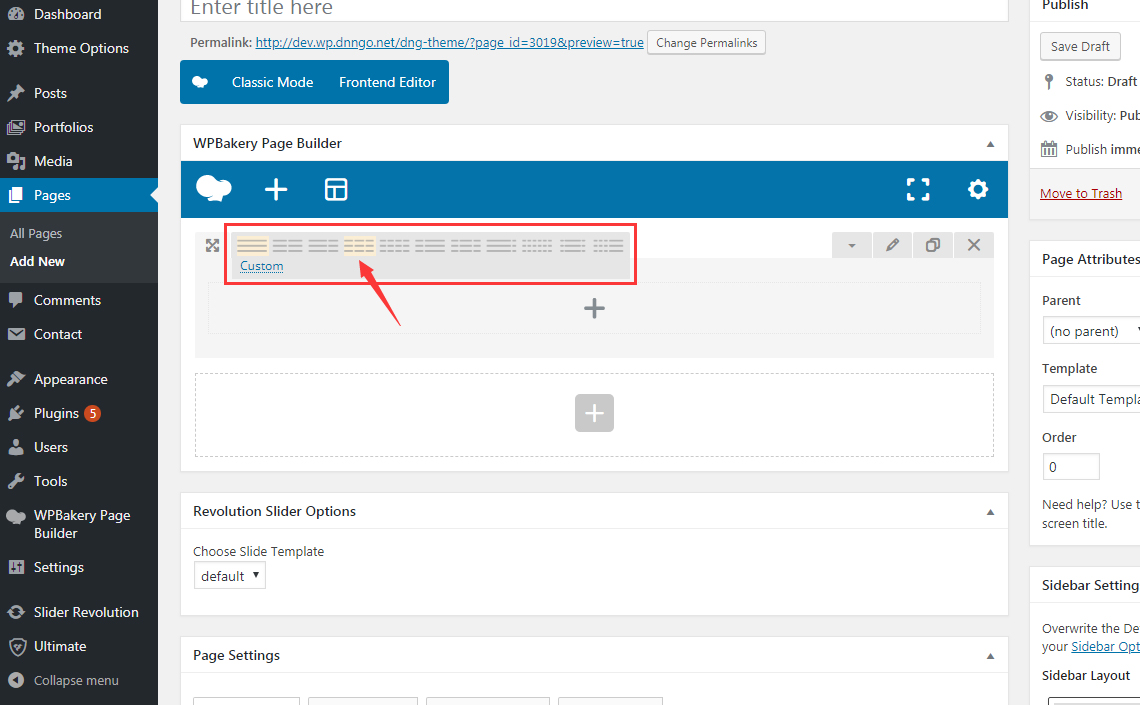
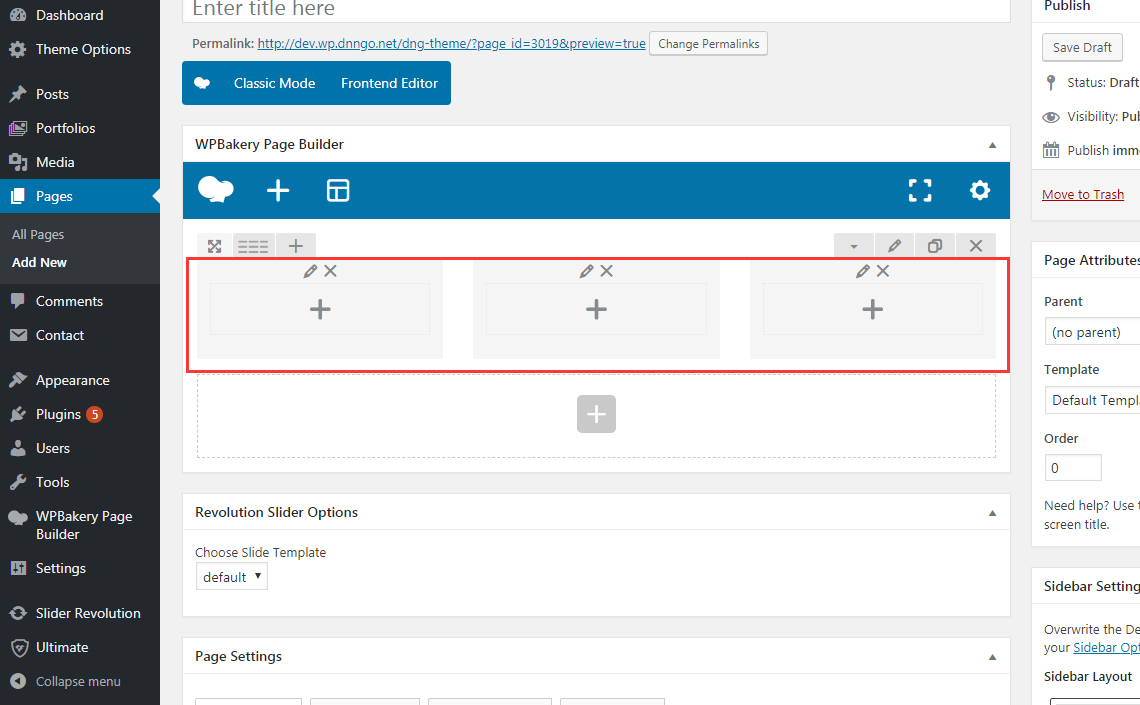
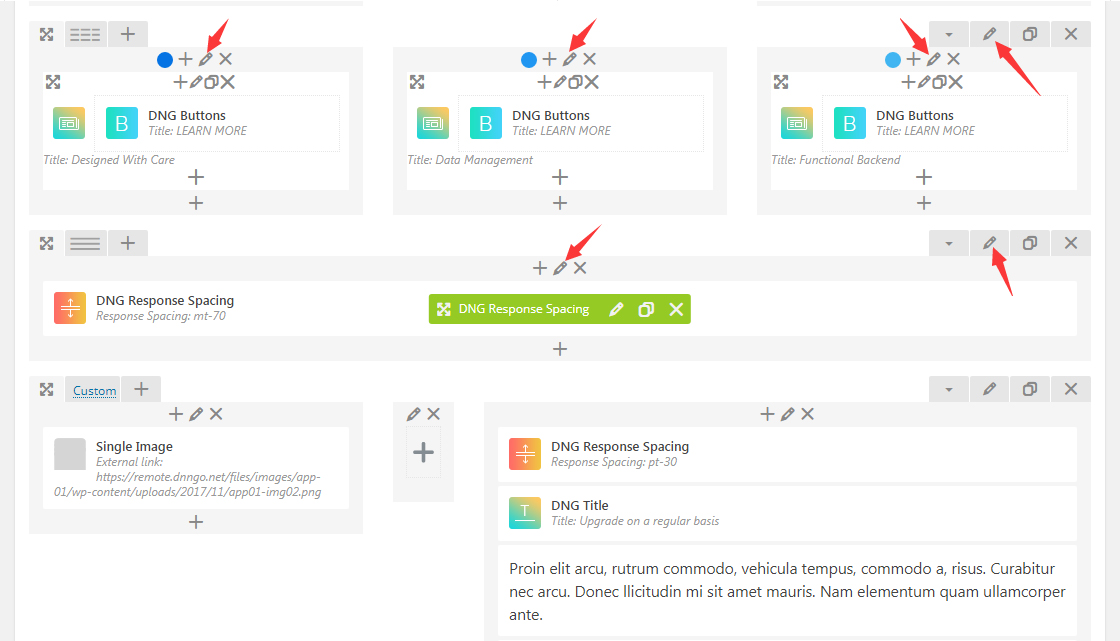
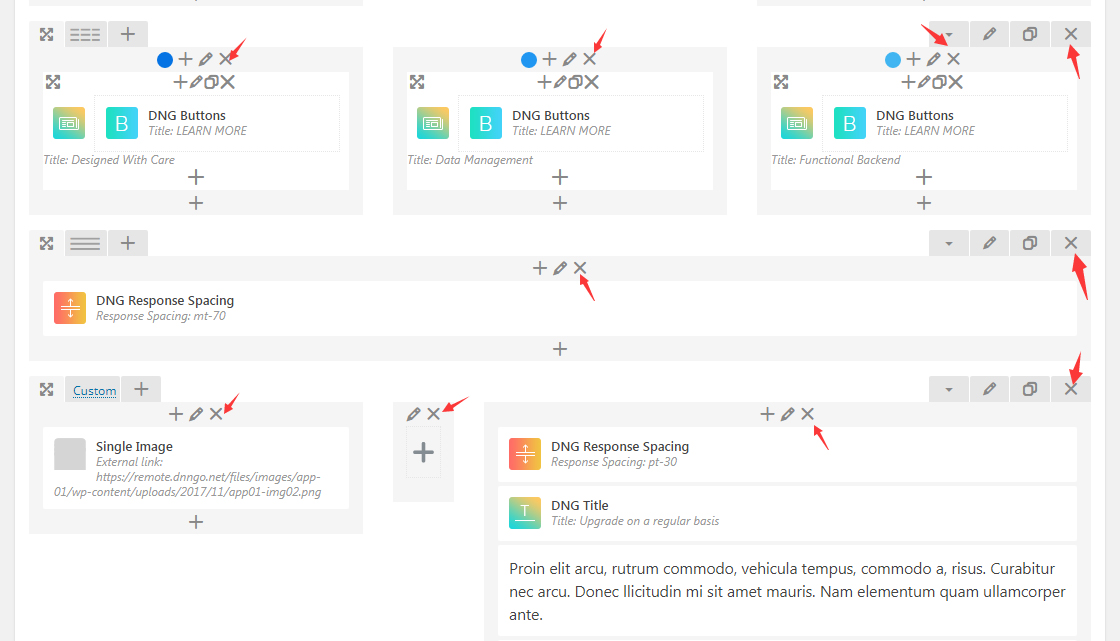
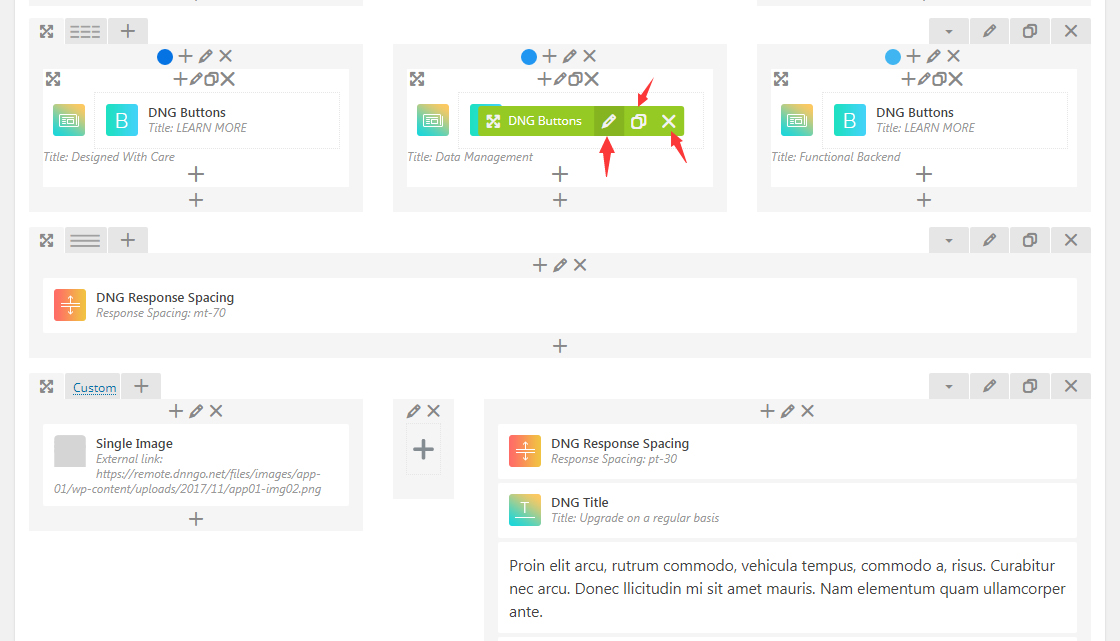
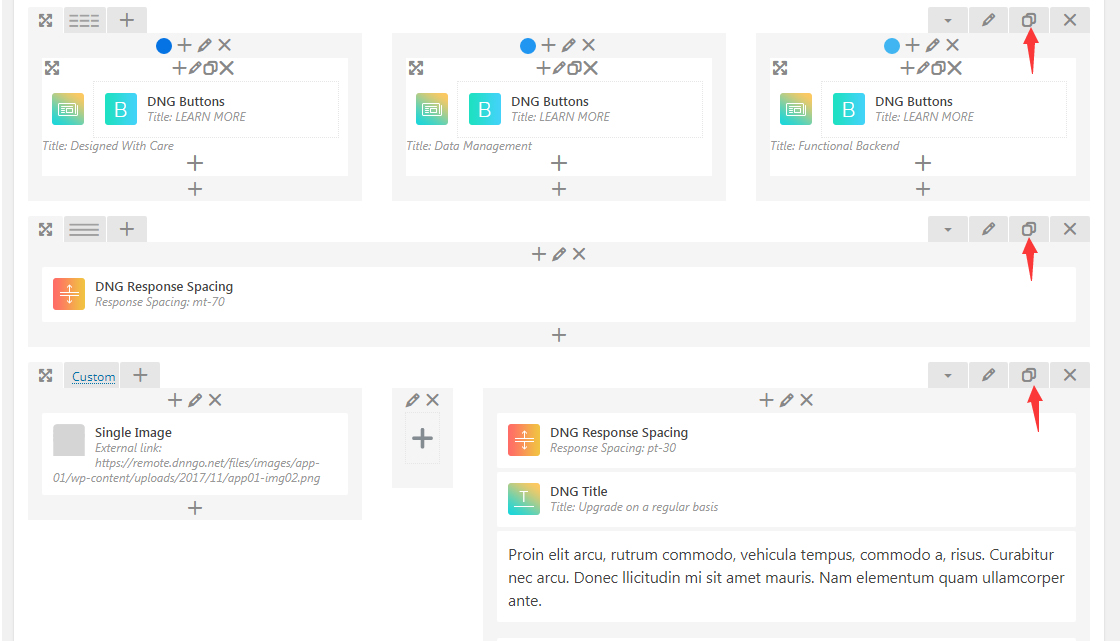
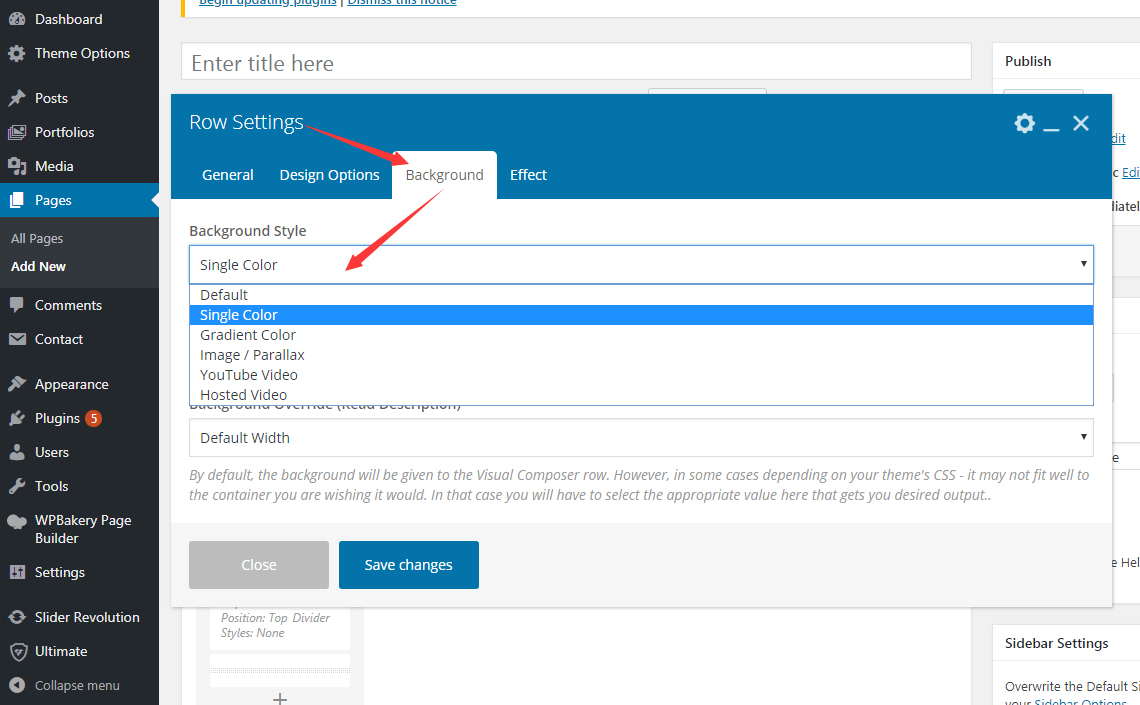
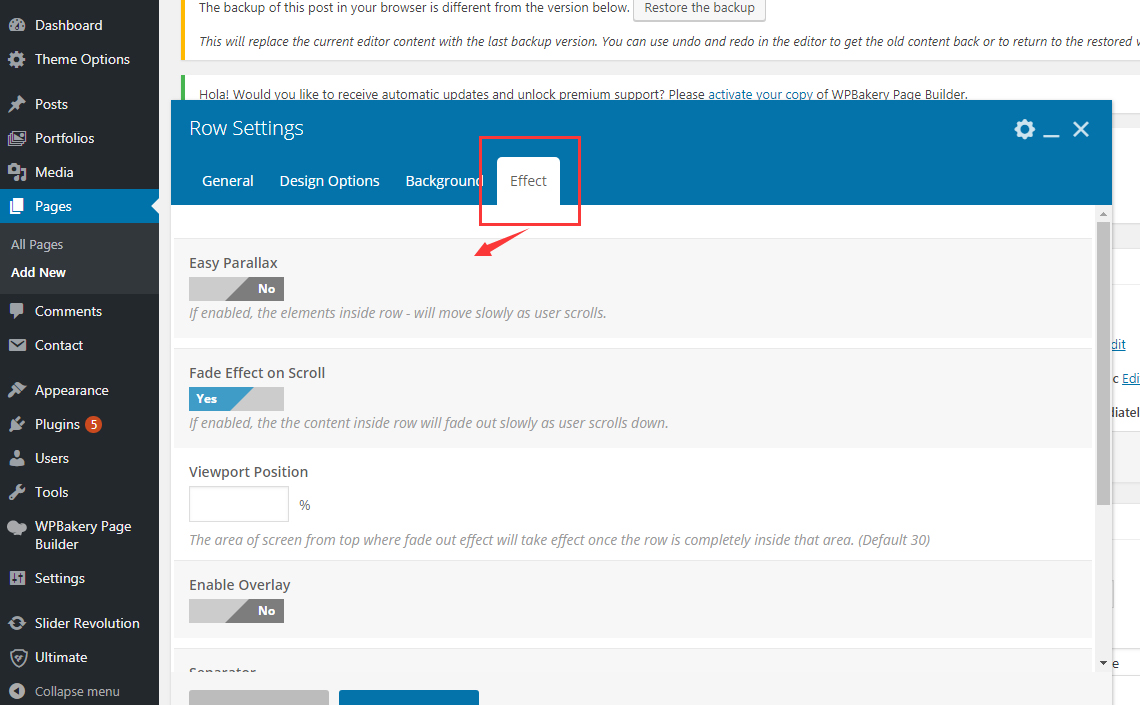
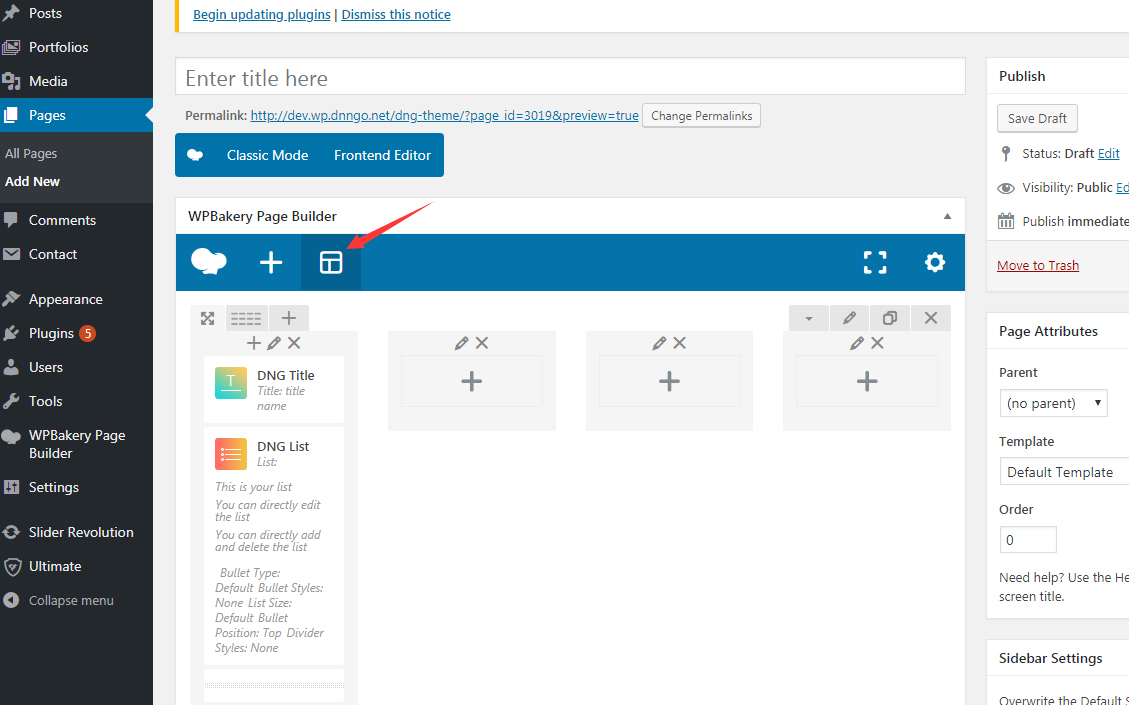
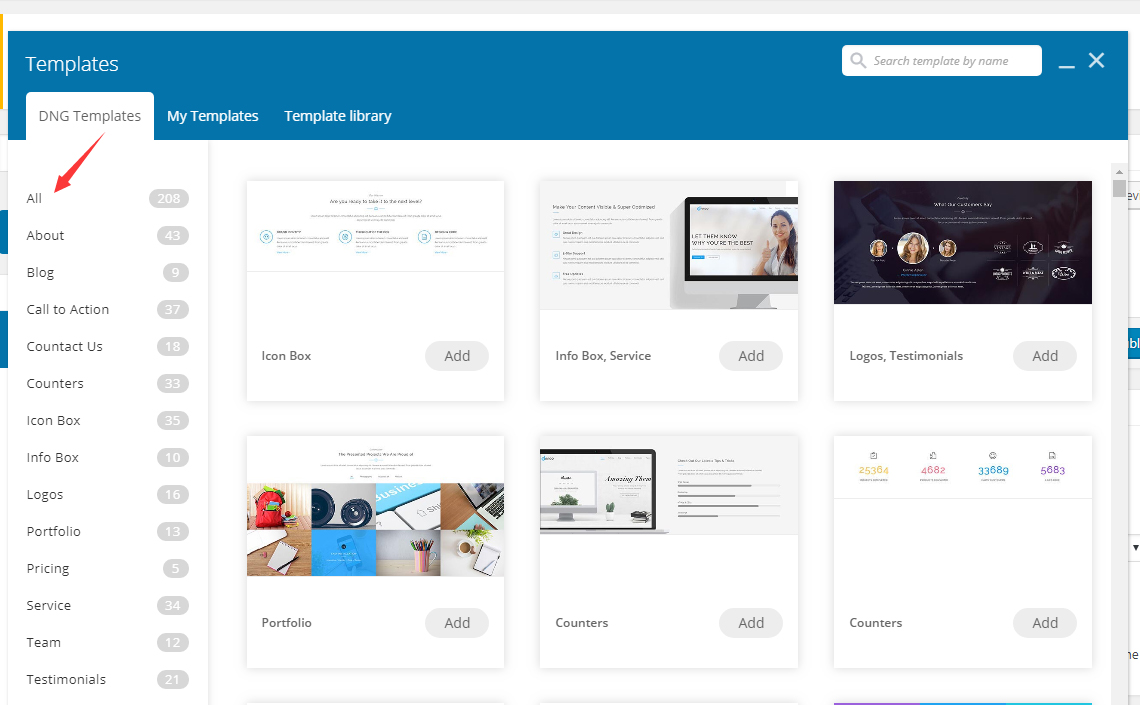
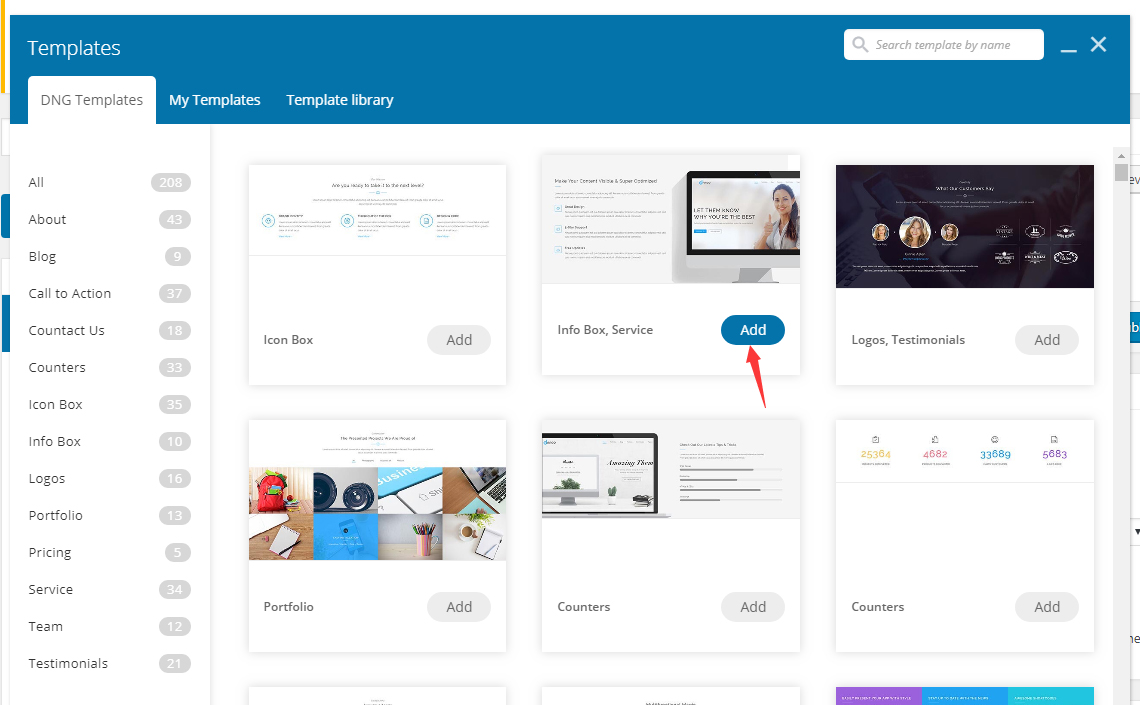
This theme includes the most popular page builder plugin on the market – WPBakery Page Builder. Based on the plugin, we carefully created 25 elements, also integrated the Ultimate Addons. So the total amount of elements reaches to 100+. You can create any kind of page you want even without any code knowledge.

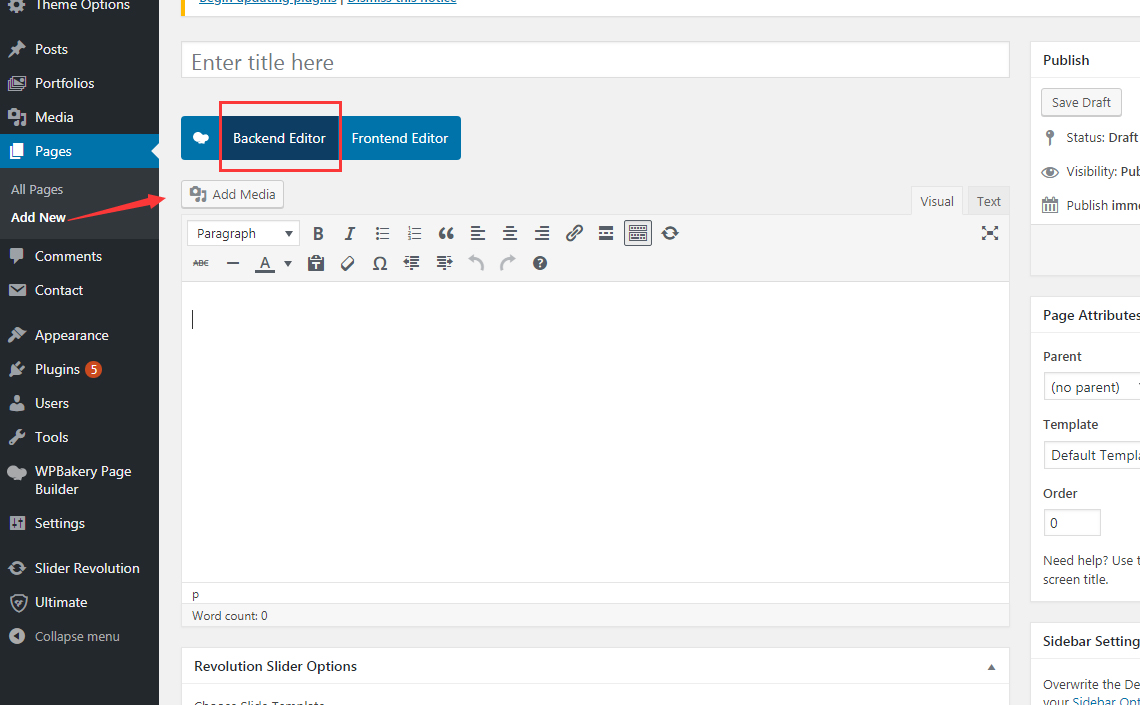
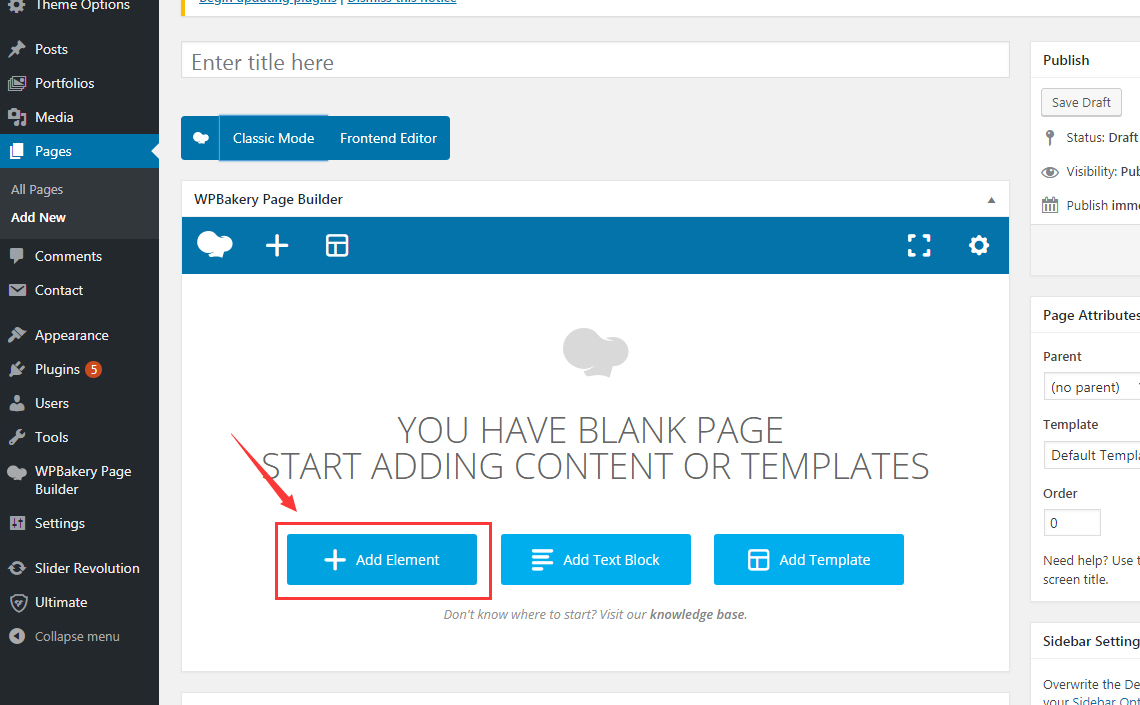
Before you start, you’d better spend a few minutes to get to know WPBakery Page Builder. And you can check the documentation of WPBakery Page Builder via this URL. Also, we will carefully explain how to use the WPBakery Page Builder in this theme with the following instruction.

Activate WPBakery Page Builder

Please make sure the following 2 points before creating pages:

01. WPBakery Page Builder is activated.
Please go to Admin > Plugins page to check and activate WPBakery Page Builder, if WPBakery Page Builder is already activated, please just ignore it.

02. All the Post types options under Custom are activated.
Please go to Admin > WPBakery Page Builder > Role Manager page, choose Custom in Post types option, then have all the names under types checked, lastly, click the Save Changes button to finish the activation operation.

Use WPBakery Page Builder with WordPress 5.0

If you’ve upgraded to WordPress 5.0 and you are no longer able to use the Page Builder, please follow:

01. Update to dng-theme 2.1.0 (or higher), update the required plugins and make sure you have selected the Disable Gutenberg Editor option in the WPBakery Page Builder > General Settings.

02. Alternatively, if you cannot update the theme, you can install the free Classic Editor plugin from the official WordPress repository and check the replace the Block Editor option.

Backend Editor

In the interface of Edit/Add New Page/Post/Portfolio, you need to click the Backend Editor button to open the control panel, then click the Add Element to set content for pages.

01. Click the Backend Editor button to open the control panel

02. Click the Add Element to set content for page

Add Row

“Row” is the main content element of WPBakery Page Builder (formerly WPBakery Page Builder). Rows are used to divide your page into the logic blocks with columns, columns later will hold your content blocks. Rows can be divided into the layouts (eg. 1/2 + 1/2, 1/3 + 1/3 + 1/3, and so on). Your page can have an unlimited number of rows. To change row’s position, click and drag row’s drag handler (top left row’s corner) and drag row around (vertical axis).

Go to Admin > WPBackery Page Builder > Backend Editor, select Row for page to add area where to put content by clicking the Add Element. And you can keep adding the next row by clicking the plus sign button under the added row.

Important Row allows you build complex layouts by inserting inner row within root level row/column. Take into account that it is not allowed to insert inner row within inner row.

01. After going to Admin > WPBackery Page Builder > Backend Editor, Add Element

02. Select Row

03. After selecting Row

04. Keep adding the next row by clicking the plus sign button under the row you just added

05. The newly added row area

Set Layout - Column

“Columns” are part of the row and they hold your content elements inside them. Columns can be reordered. Click and drag column around (horizontal axis). That way you can group elements in logical groups and then drag them around with your mouse (to re-position).

At the top left of the added row area, you can quickly set the row’s structure by hovering the 2nd tab in the upper left corner, for example, you can set the row to be 3 columns with same width. You can also add new columns for the row by clicking the 3rd tab (with the “+” signal) in the upper left corner. Also, you can set the width for columns individually in Responsive Options.

01. Hover the 2nd tab

02. Set the row’s structure

03. Structure of 3 columns in one row

04. You can add new columns for the row by clicking the 3rd tab (with the “+“ signal) in the upper left corner of it.

05. Click the pencil icon to go to the Column Setting interface

06. Set the width of columns in Responsive Options

Edit Element

Clicking the + signal in row or column area can add element. Clicking the pencil icon above row and column can see more settings. Clicking the X signal can remove row and column.

01. Clicking the pencil icon above row and column can see more settings.

02. Click the X signal can remove row and column.

After adding element in row or column, there will be a green setting bar when you hover it, click the expand icon and don’t let it go, yo can drag the element to other places. Clicking the pencil icon will check more settings, clicking page icon can copy elements. Clicking X icon can remove elements.

If you want to copy all the elements in one row, you can just click the page icon in the upper right corner of the row.

Row Settings

Clicking the pencil icon in the upper right corner of the row can check more settings, and you can set the structure and feature of the row here.

General

Row stretch – Select stretching options for row and content (Note: stretched may not work properly if parent container has “overflow: hidden” CSS property).

Default – Set the width of the row to be the same as the theme. You can set the width of theme in Admin > Theme Options > General > Layout.

Stretch row – Set to stretch the width of row to be the same as browser window, but the width of content won’t be stretched. You can use the setting to create a full width background section, and you can set the background color in Row Settings > Design Option.

01. Full width background section

02. Set the background color in Row Settings > Design Option

Stretch row and content – Set to stretch the width of row and content to be the same as browser window, you can use the setting to create a full width content section.

Stretch row and content (no paddings) – Set that no padding around the content.

Columns gap – Set gap between columns, all columns within row will be affected by this value.

Full height row? – Set gap between columns, all columns within row will be affected by this value.

Equal height – Set all columns to be equal height. (Note: all columns will have same height as longest column.)

Content position – Set content position within columns – Default, Top, Middle, Bottom. (Note: Default value will be used top or other if defined within theme.)

Use video background? – If checked, video will be used as row background,and YouTube link option will show to used as input video URL.

Parallax – Add parallax type background for row. (Note: If no image is specified, parallax will use background image from Design Options).

Image – Select image from media library for parallax. (Note: active only if “Parallax” effect is chosen.)

Parallax speed – Control parallax effect speed with 1.5 value set as default. For traditional parallax effect 1.0 is the minimum value.

Note Active only if Image or Video parallax effect is enabled.

CSS Animation – Select type of animation for element to be animated when it “enters” the browsers viewport.

Row ID – Enter row ID (Note: make sure it is unique and valid according to w3c specification.)

Disable row – If checked the row won’t be visible on the public side of your website. You can switch it back any time.

Extra class name – Add class name in order to refer to this element in CSS.

Design Options

You can set the appearance of the row here. For example, border color, background color and etc.

Background

Except for General settings of background, you can set the background of row here, and own more background styles. You can set background as pure color, gradient color, image,Parallax, YouTube Video and Hosted Video.

Effect

Set the effect of row. In order to make Effects below to work, you must select something except “default” in background tab. May be single color.

Shortcode templates

DNG Templates is the WPBakery Page Builder extension we created, which includes over 200 default content block templates so you don’t have to create a page from scratch.

Step 1. Go to BACKEND EDITOR in WPBakery Page Builder. To click the Add Template button or the above template icon to pop up the Templates window.

Step 2. In DNG Templates tab, you can see all the shortcode templates included in this theme (currently there are 200+). You can select different kind of template by clicking the navigation on left according to your own needs.

Step 3. Add the templates to pages by clicking the Add button on the bottom right of the template.

Copyright 2018 by DNNGo Corp